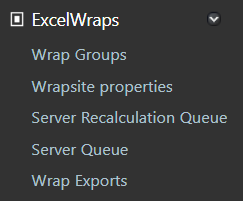
The ExcelWraps pages on the Wrapsite define each Wrap and the Wrapgroups. This is where you download the Wrapsite properties for WrapCreator and design wraps that you then upload on the same page. Two job queues show you the status of tasks that run in the background.
Many system events related to Wraps can be logged in the Audit Trail, e.g. when Wraps are created, updated, or deleted.
The Audit Trail can also register every time Wraps are created, viewed, updated, deleted, signed, or unsigned.
The Wrap Definitions page is the home for all the Wraps in your Wrapsite. Use the Wrap Definitions page to import new or updated Wraps after conversion with WrapCreator. You can set various properties of each Wrap template and manipulate its instances.
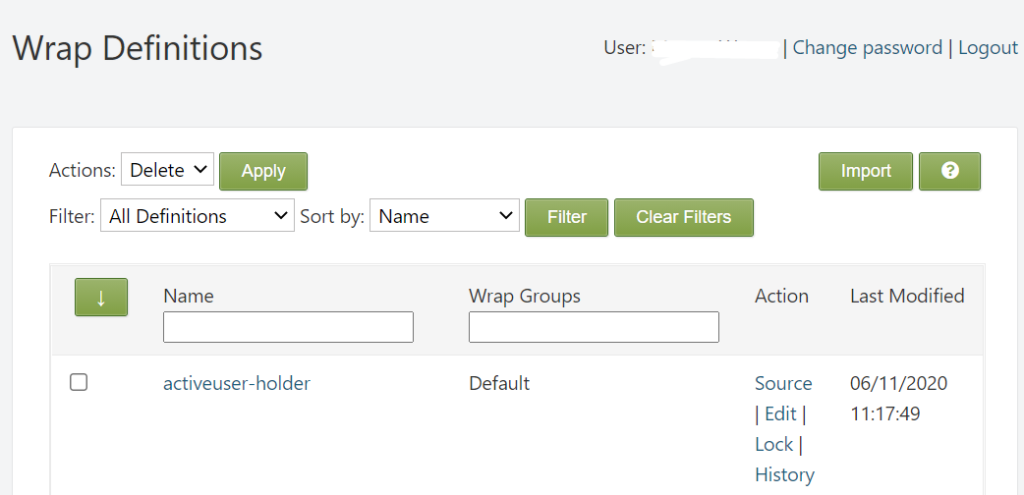
The Apply button performs the action selected in the Actions menu for the selected Wraps. For this Action menu, you can only select Delete. The Wrap templates that you have selected and all their wraps are queued for deletion after which you are taken to the server queue where you can follow the job that was created. If you delete a Wrap, you must upload the definition again if you want to regain access to it. Deleting Wraps is a very rare operation that you would normally do only during development and testing.
The Filter setting allows you to show all Wrap definitions or only the ones that are locked (disabled). The Sort by setting allows you to order the Wraps by Name, Last Updated time or Wrap Groups. Press the Filter button to apply the filter and sorting settings and refresh the list of Wraps.
You design and edit Wrap definitions with an add-in for Excel called WrapCreator. When the source spreadsheet is converted to a Wrap template, you get a .zip file that needs to be imported to the server.
You can also import existing wraps that have been exported as .xml or .xlsx files using the export functions under Wrap instances below. The import operation also supports a .zip file containing a .xml file.
The ability to import data into a Live wrapsite is governed by an ExcelWraps feature permission. This setting does not affect a Staged wrapsite.
If you import wraps for a wrap template that has an AutoNumber cell, some special processing is performed.
Click on the Import button to add new and update existing Wraps. If the import file contains instances, these will be imported, too. If a wrap in the import file already exists in the database, it is updated with the values in the import files.
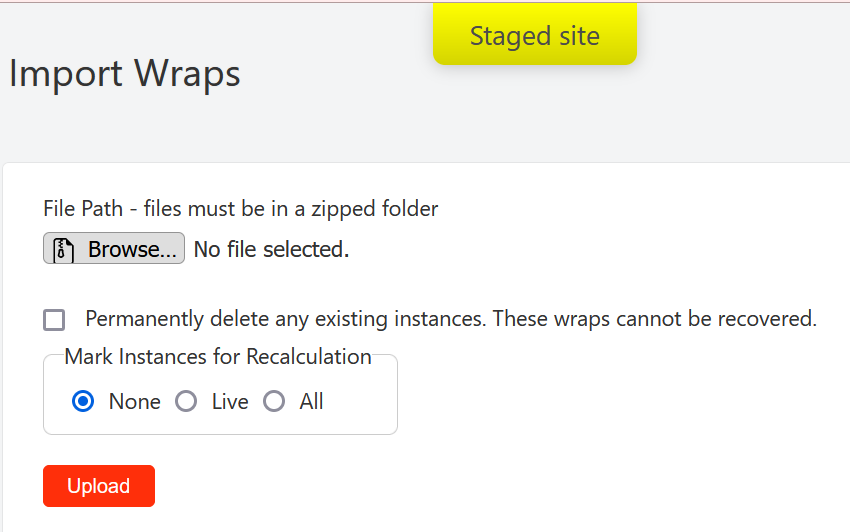
Click Browse… and navigate to the folder where the file you want to import is located. Select the file and click OK.
During testing, you may want to Permanently delete any existing instances when you upload a new version of the Wrap in order to start testing from scratch. There is no undo for this operation. These wraps cannot be recovered. If you don’t delete existing instances and you import a wrap that has the same unique keys as an existing wrap, the existing wrap is replaced.
When you update a wrap template, you may want to recalculate its existing wraps to ensure that all the values in all the wraps are calculated using the most recent formulas and static values in the wrap template. In this case, select Mark instances for recalculation. You have the option to recalculate only the live instances or all instances including the frozen ones. If you have only made layout changes, or if you plan to recalculate the affected wraps manually, you may skip this step.
When you import a new version of a wrap template and it is missing cells that were in the previous version, you may get a warning message. This is because existing frozen Wraps have content for this field saved in the database. Please contact client services if you need help rectifying this situation.
When you import a new version of a wrap template with unnamed WrapLink cells, you risk losing data. You may get a warning message because existing frozen Wraps have content for this field saved under a different name. Please contact client services if you need help rectifying this situation.
If you upload a new version of a Wrap template and it doesn’t work as you intended, you may need to revert to a previous version.
To restore a previous version, first locate the History link for the Wrap template.
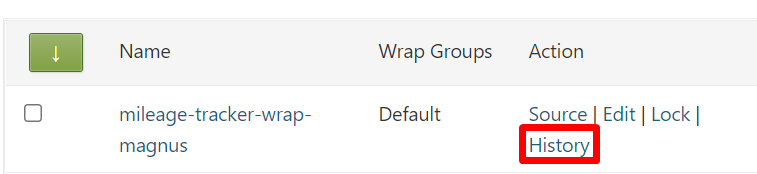
This opens the Wrap Import History which contains all previously imported versions of the wrap template. 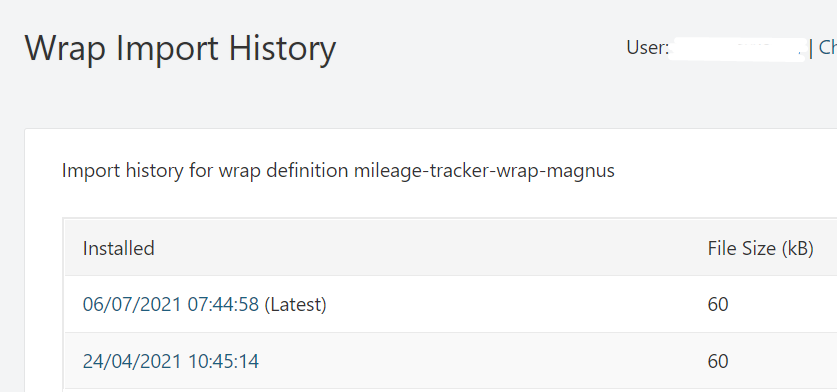
Click on the date for any version in the list to download the ZIP for this version to your local workstation. You can then import it again, as it is, reverting back to this version.
Note: There are many reasons for an old version of a Wrap template to be incompatible with the current version, as described on the Making changes to your wrap page. You should exclude any risk of incompatibility before you attempt to revert to a previous version.
The down arrow selects all Wrap definitions.
The Name column contains the name of the Wrap template. The search box is used to find Wrap templates by name – just enter a part of the name and press Enter.
The Groups column contains the names of the Wrapgroups that the Wrap template belongs to. The search box is used to find Wrap templates by wrapgroup name – just enter a part of the wrapgroup name and press Enter.
The Action column allows you to download the Source for the Wrap template in Excel format, Edit the Wrap properties described below, Lock the Wrap definition to prevent Users from using it, or display the History of imported versions. If you don’t have the Source action, you need to ask your ExcelWraps administrator for a user role with the Can download wrap source files permission. If you don’t have the Lock action, you need to ask your ExcelWraps administrator for a user role with the Lock wrap definitions permission.
The Last Modified column contains a timestamp for the most recent update to the Wrap definition.
If you click on the name of a Wrap template, you get to a list of its wraps. If you click on a wrap, it opens for editing.
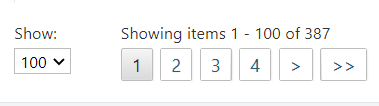
The number of items per page is controlled by the Show parameter at the bottom of the list. If the number of items exceeds this setting, a page navigation control appears to the right of it, allowing you to navigate directly to the page you want.
If you click on the name of a Wrap template, a list of its wraps appears.
The Apply button performs the action selected in the Actions menu for the selected Wraps. Many of these and other actions can also be performed using the similar Action menu in MyWraps, with the additional ability to first filter the wraps according to your requirements.
To free you from having to wait for the more time-consuming Actions, they will initially just create a background job on either the Server Recalculation Queue or the Server Queue and then allow you to continue with other work. You need to visit the appropriate queue if you want to verify the status of the background job.
The possible actions are:
These actions have been replaced by new and better options that we suggest you explore first. The Actions below are likely to be removed from the menu in the future.
Press the Filter button to select only the wraps that are in the Live or Frozen state, are awaiting your signature, or have previously been signed by you.
The down arrow selects all the Wrap’s instances.
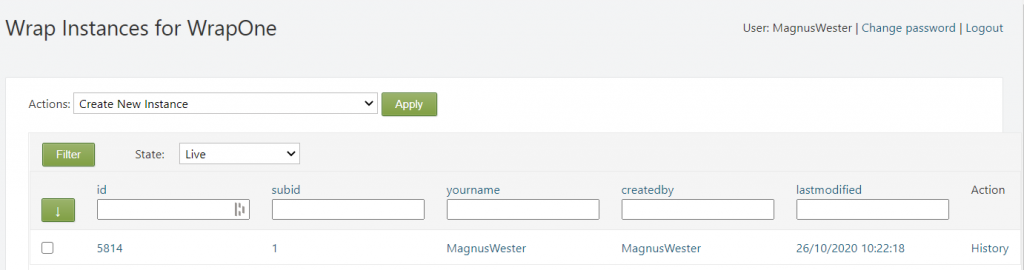
The id column contains an internal identification of the wrap. It is assigned automatically, it is unique and it cannot be changed.
The subid and yourname columns are the Unique Keys for the Wrap template in this example. All the Unique Keys are included in its list of wraps to help you select the instances you are looking for. The Unique Keys for a Wrap are defined on the Wrap tab in WrapCreator and cannot be changed.
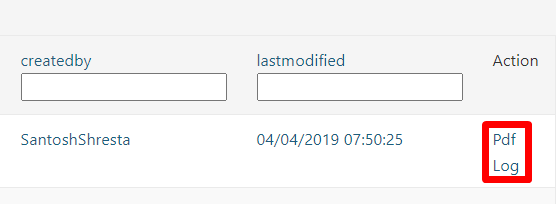
The createdby column contains the userid of the user that created the wrap, and thus owns it as part of the ExcelWraps permissions model.
The lastmodified column contains a timestamp from when the wrap was last saved to the database.
You can type filter values into the text box at the top of each column to filter the list of wraps. Read more about column filtering on the help page for MyWraps.
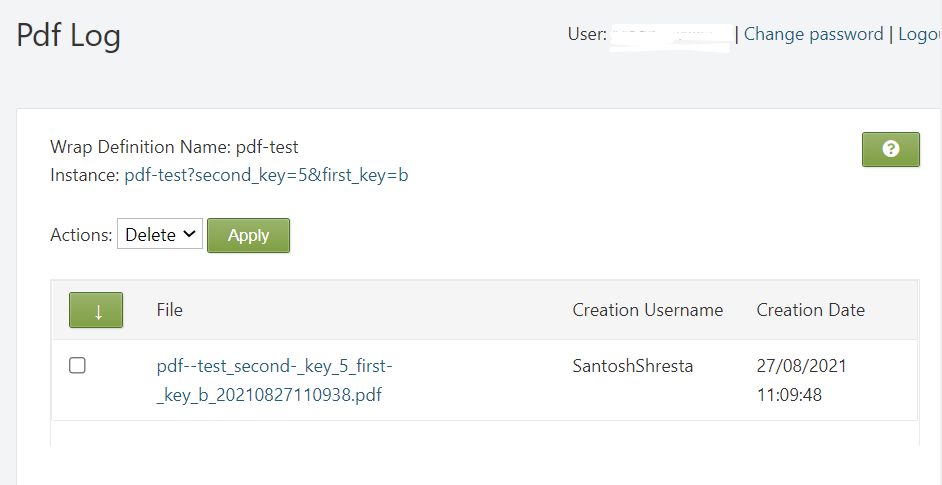
There is one PDF log per wrap, containing all the PDF files that have been printed for the wrap. The link to the PDF log is in the Action column.
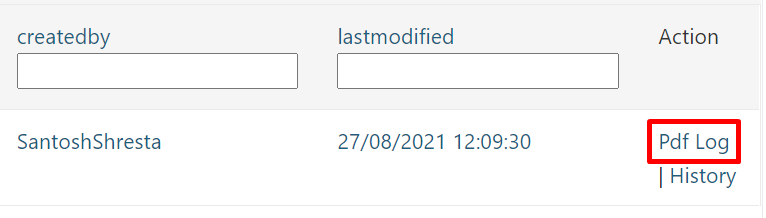
The PDF log has one row for each PDF created for the wrap. Each row contains the name of the user that caused the file to be generated, and the timestamp for the file. Click on the link to open the PDF in the web browser, or download the file using the browser.
To remove PDF files, tick their checkbox, select Delete in the Action column, and press Apply.
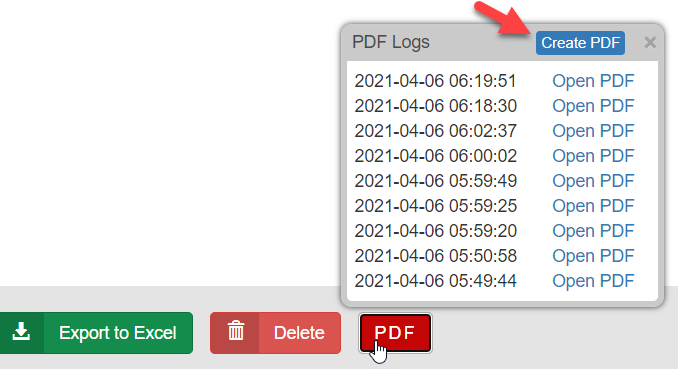
End users can create and download PDFs directly from the PDF Log in the wrap.
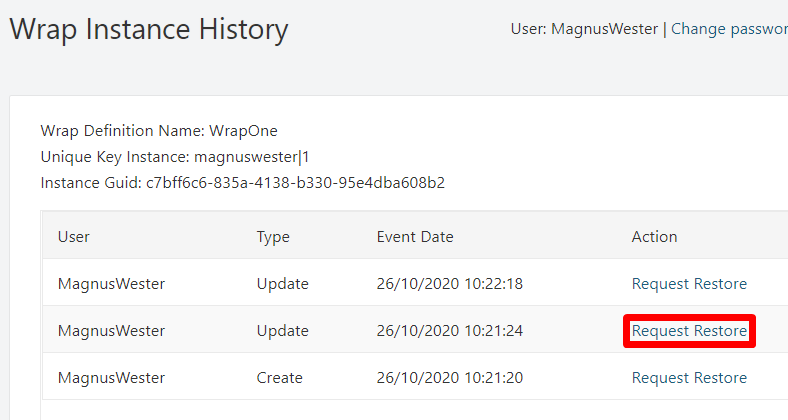
Each modified wrap in the list has a History link in the Action column that opens the Wrap Instance History page containing the version history for the selected wrap.
Use Request Restore to request that the wrap is reverted back to any previous version. When the restore job has been run, the contents of the wrap will correspond to the version you selected to revert to.
If you don’t find any wrap history for a wrap template, please verify that you have enabled Wrap History for the wrap template on the Wrap tab in WrapCreator.
By default, only Administrators can request a restore. You can grant this ExcelWraps feature permission also to other Roles.
Example: The wrap in the version history below was modified in error at 10:22:18. To revert to the previous version, the administrator clicks on the Request Restore link for the version of the wrap that was saved 10:21:24. After the restore job is completed, the modifications from 10:22:18 have been reverted.
The User column contains the ID of the user that last saved updates to the wrap. This is also true if a wrap is deleted – the user ID shown here has no relation to the delete operation.
If you click on a wrap, it opens for editing.
The number of items per page is controlled by the Show parameter at the bottom of the list. If the number of items exceeds this setting, a page navigation control appears to the right of it, allowing you to navigate directly to the page you want.
Clicking on the Edit link for a Wrap Definition allows you to modify some of its properties.
ExcelWraps is a multi-user system. There is always a risk that two or more users access the same Wrap simultaneously. For read-only access, this happens naturally and without conflicts, but if two users need to modify the Wrap and their requests overlap, a synchronization issue may occur.
Consider the following scenario:
In step 6, the version saved by Secondo does not include the modifications made by Primo. The changes made by Primo will be overwritten and lost.
To prevent this, ExcelWraps uses a locking system that alerts Secondo that the wrap has been modified since he/she opened it. When this happens, Secondo has two options:
This is referred to as optimistic locking and works well in most cases.
ExcelWraps is used to support workflow processes where it is unlikely that two users or workgroups would inspect the same carriage or repair the same fault. If you run into repeated conflicts like the one above, you may want to redesign the wrap, e.g. to use one wrap for the electrical checklist and one for the mechanical checklist, instead of having both checklists in the same wrap which may greatly increase the risk of conflicts.
Optimistic locking is perfectly safe and there is no risk of overwriting a previous change to the wrap. However, if these conflicts happen very often, and the wrap cannot be redesigned to avoid them, ExcelWraps also offers an explicit locking model that we call pessimistic.
With pessimistic locking, users press a Request Edit Lock button to explicitly lock a wrap before they begin to edit it. When done, they use a Release Edit Lock button to allow other users to take the edit lock. Instead of having trouble when a rare conflict occurs, users now have extra steps to perform for every edit.
Unfortunately, users regularly forget to release the edit lock. Administrators can be called in to use a Seize Edit Lock button and then release the lock for others to take. Before doing this, they must verify that the lock isn’t held legitimately by a user that is performing a lengthy edit.
Pessimistic locking creates extra work for all involved. It is primarily useful when edits take a very long time because users need to perform many complicated manual operations while editing the wrap, e.g. when storing a large number of measured values. In this case, it may be more time-consuming to do all the measurements again in case of a locking conflict than to first acquire the lock explicitly. Again, consider redesigning the wrap to avoid simultaneous edits.
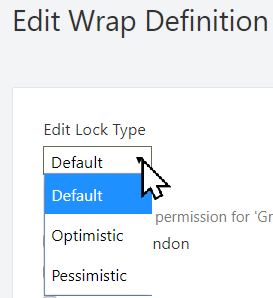
The Wrapsite Settings contain an Edit Locking setting that sets the default lock type for an entire wrapsite.
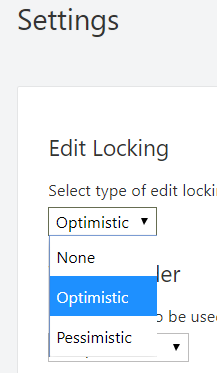
Most users would have this set for Optimistic locking by default.
The None setting means that users will not be informed when data is lost due to locking conflicts. We recommend that you discuss your requirements with your client services team before you select this setting.
Each Wrap belongs to one or more Wrapgroups. These are part of the ExcelWraps permissions model and define what rights each user role has to the Wrap and its data.
You assign the Wrap to its Wrapgroups simply by ticking each group you want the wrap to be a member of.
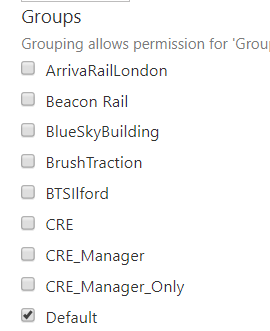
The Wrapgroups are defined on the Groups tab, see below. Read more about Wrapgroups and permissions on the Wrapgroups and workgroups help page.
Wraps can be printed as PDF files. The PDF files are formatted the same way the Wrap is formatted on the screen.
Printing can be initiated manually as an Action on the Wrap Instances page, or automatically when the wrap is signed or unsigned using a setting below.
A “parent” PDF file can append all the PDF files for its “children” wraps, e.g. to produce an exam book that documents everything for a specific exam.
Read more on the help page about printing wraps to a PDF file.
For printed wraps, you can set various options for the PDF files.
Note that existing PDF files are unaffected by changes to these settings,. If you select to generate PDFs in Landscape mode, and a wrap already has a PDF that is current, it will be considered current even if it was generated in portrait mode. You must manually regenerate the PDF file to use the latest settings, in this example to get a landscape mode PDF.
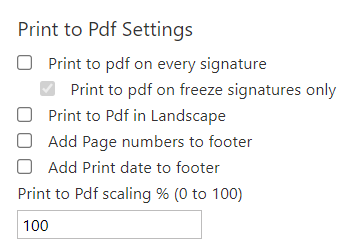
Printing a wrap when it is signed makes it easy to confirm a completed process by e-mailing a “receipt” for it. Tick the Print to PDF on every signature checkbox to enable the feature. A PDF will be generated if a signature field is signed, and if a signature field is unsigned.
If you only want to print the PDF for the final freeze signature, and not the intermediate signatures, tick Print to pdf on freeze signatures only.
The default is to generate the PDF in portrait mode (shortest side up). If the Wrap is wide, you can also have it generated in landscape mode.
You can optionally add page numbers and the print file generation date to the footer of each page in the file. If child PDFs are being appended to a PDF book, you should only use these settings for the master Wrap, or two different page numbers or dates may appear on some appended pages.
Adjusting the scaling to zoom the output to 1-100% of its normal size.
There is one PDF log per wrap, containing all the PDF files that have been generated for the wrap. The link to the PDF log is in the Action column on the Wrap Instances page.
End users can create and download PDFs directly from the PDF Log in the wrap.
This is where you enable a Wrap for automatic recalculation, including periodically creating new wraps, e.g. when saving KPIs automatically.
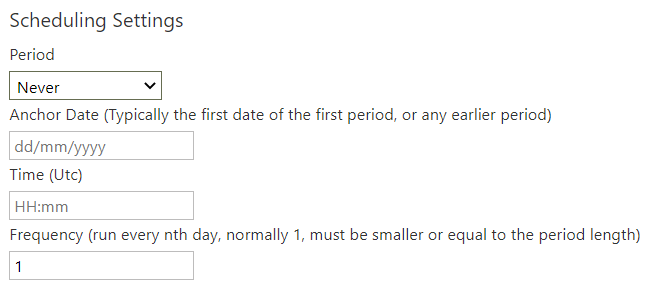
The KPIs in a WrapMap document the performance indicators for a given period. You select the length of the period that best fits your business needs.
We count the days of each period based on an Anchor Date, which can be any date in the past that would have been day 1 of the intended cycle.
The anchor date is only an abstract point of reference and does not imply that KPIs have been saved from that specific date. Performance data is not saved until you create the first wrap in the WrapMap, the random “start” date if you will. The first wrap contains the KPIs for the (possibly incomplete) first period, from the arbitrary start date to the end of the period as defined by the anchor date. Latter wraps will cover full periods, starting and ending as defined by the period length, counting from the anchor date.
When triggered by the frequency setting, the ExcelWraps server automatically starts the recalculation of the current WrapMap at or slightly after the designated time, which is expressed relative to the UTC (Greenwich meridian) timezone.
Many businesses operate around the clock, like in transportation. In these cases, one often sees operating hours starting with the morning traffic, e.g. a business day can run from 04:30:00 to 04:29:59 the next calendar day and it is for this period the KPIs are collected. In this case, you probably don’t want the KPIs for the previous full day to be calculated until after 04:30, converted from your timezone to UTC.
Other businesses work across timezones. A company in Germany with most of its business on the US west coast may not want to recalculate “this week so far” KPIs until after 8:00 UTC the next day to occur after midnight in San Francisco.
In most cases, you’ll want the current WrapMap to be recalculated daily, so that your analysts have up-to-date KPIs every day also for the current period. WrapMap recalculation is usually light work for the server. All the wraps in the WrapMap that contain historical data were frozen at the end of their respective period, so recalculation only affects the single current WrapMap instance which in turn only aggregates data from the Wraps that provide performance indicators for the same specific timespan.
There is no technical reason to set this to any other value than 1 for daily recalculation. If your business needs dictate that some monthly KPIs are recalculated only every 7 days, you should set this value to 7.
You can only enter positive integers that are less than the period length. The frequency is reset when a new period starts. If the period is monthly and the frequency is 28 there will be only one interim recalculation, on day 28 of each period. If the period is monthly and you set the frequency to 32, interim recalculations will never occur and each WrapMap instance will only be recalculated at the beginning and end of its period.
The Wrap Groups tab is where you define and manage your Wrapgroups. Each Wrap belongs to one or more Wrapgroups.
A Wrapgroup may be owned by a Workgroup, or be available for all Users. For each Wrapgroup you define the level of access per User Role.
Read more about Wrapgroups and permissions on the Wrapgroups and workgroups help page.
Designing Wraps in WrapCreator requires that the Excel add-in knows some basics about the Wrapsite, e.g. the Users, Roles, and Workgroups when adding widgets such as UserSelector. When you add a WrapLink, the add-in needs to know about your Wraps and Wrapgroups.
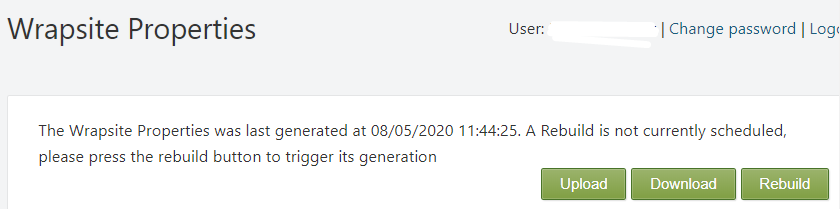
When you press the Download button on the Wrapsite properties tab, a ZIP file is downloaded with all the details about the Wrapsite that WrapCreator needs to know. You load this file into WrapCreator on the Account tab of the task pane.
For WrapCreator to keep up with changes to the Wrapsite, you may need to update the Wrapsite properties in the add-in now and then. WrapCreator will function correctly without the most recent Wrapsite properties, but will be unable to create WrapLinks to Wraps it doesn’t know about or use Roles that were not included in the most recent set of Wrapsite properties.
Learn more on the help page for the Account tab on the WrapCreator task pane.
When a Wrap definition is changed, existing live Wraps may require recalculation to be brought up-to-date on the most recent formulas and defaults as defined in the Wrap. A recalculation operation can involve a lot of Wraps. If too many wraps are recalculated at the same time, it may overload the server. This is why there is a Server Recalculation Queue on which all wraps with a pending recalculation are placed, waiting for their turn to be recalculated.
You can follow the serialized processes by monitoring the Server Recalculation Queue on the Wrapsite. A new wrap will enter the queue as Pending, get selected for recalculation when it is at the top of the queue, and then ticked off as Recalculated. If an error occurs, the wrap is instead flagged as Error.
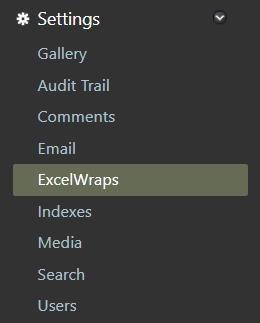
To monitor the server recalculation queue, click on the ExcelWraps link in the left-hand sidebar of your Wrapsite Administration dashboard, then select the Server Recalculation Queue tab.
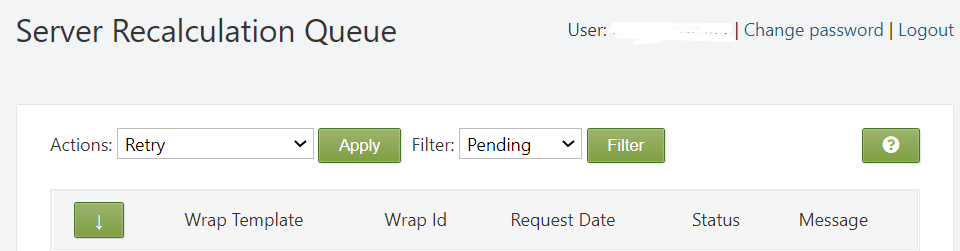
To manage wrap jobs on the queue, you tick one or more of their checkboxes in the list and then press Apply to perform one of the following Actions:
Use the Filter dropdown and the Filter button to select what type of wraps you want to work with on the dashboard.
The down arrow selects all the recalculation jobs.
The Wrap Template column contains the name of the Wrap.
The Wrap id is an internal identifier for the wrap.
The Request Date shows when this recalculation was requested.
The Status column contains Pending, Recalculated, or Error.
The Message column may offer more information about errors.
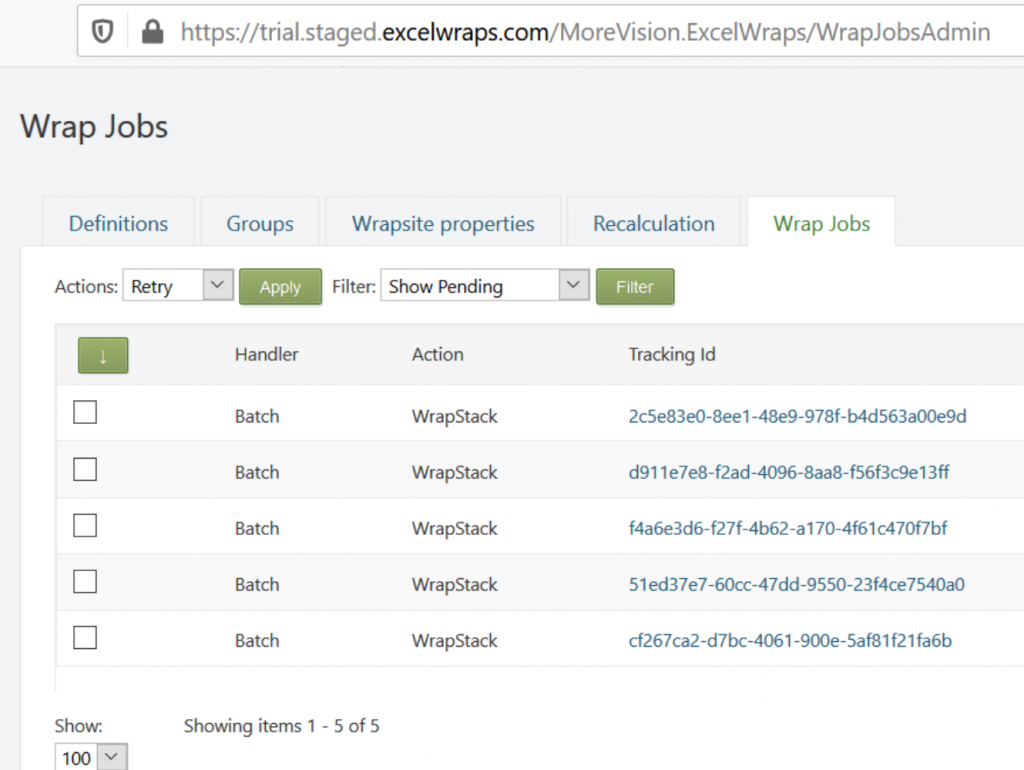
Most work on the wrapsite is performed immediately, to provide rapid response times to Wrap users. A few types of work need to be run in the background, to avoid that the user has to wait for the system, and run only a few at a time to ensure that the server isn’t overloaded. Such serialized units of work are called Wrap jobs. The ExcelWraps job queue contains the Wrap jobs that are waiting to be run.
You can follow the serialized processes by monitoring the Server Queue on the Wrapsite. A new job will enter the queue as Pending, get selected and run when it is at the top of the queue, and then ticked off as Complete. If an error occurs, the job is instead flagged as Failed.
To monitor the job queue, click on the ExcelWraps link in the left-hand sidebar of your wrapsite dashboard, then select the Server Queue tab.
To manage wrap jobs on the queue, you tick one or more of their checkboxes in the list and then press Apply to perform one of the following Actions:
Use the Filter dropdown and the Filter button to select what type of jobs you want to work with on the dashboard.
The down arrow selects all the Wrap jobs in the list.
The Handler column tells you what kind of job it is.
The Action column describes what the job is doing.
The Tracking Id is a unique identifier for the job.
If you click on the tracking ID for a Wrap job, you get to a page showing the detailed information for it.
The number of items per page is controlled by the Show parameter at the bottom of the list. If the number of items exceeds this setting, a page navigation control appears to the right of it, allowing you to navigate directly to the page you want.
The backend processes are shared between all Wrapsites. If none of your Wrap Jobs are running, it may be because the server is busy with other Wrapsites. In some situations, the queue may also be quiesced, e.g. in preparation for a system restart. Please contact client services if your Server Queue appears to be clogged.
The Wrap Exports page opens when you request certain background exports of data from ExcelWraps. If you stay on the page, it is continuously refreshed every 15 seconds, to make new export files visible as they become available.
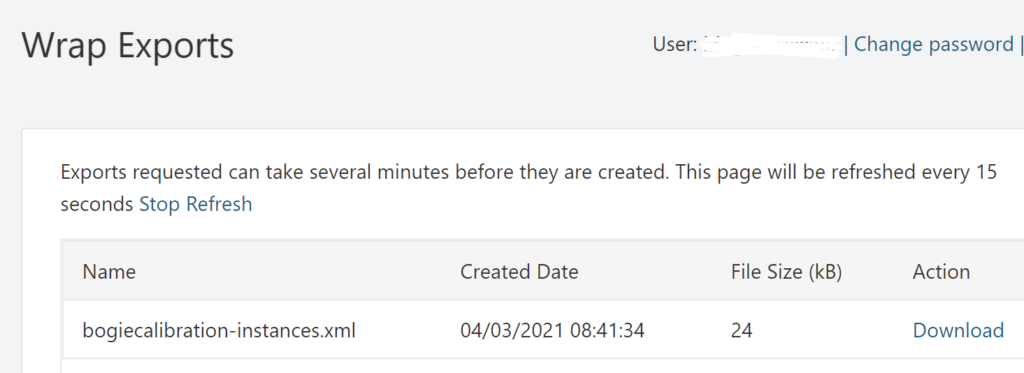
In the screenshot above, the admin requested the export of all instances of a Wrap. After approximately three minutes, the resulting file appeared in the list. The Download link downloads the generated file to your device.
Exported files are automatically deleted after a fixed number of days. If you need a file that has been deleted, just request the corresponding export again.
You can wait for the corresponding Wrap job to finish, or you can do other things and return to the Wrap Exports page later. There is a link to the Wrap Exports page in the ExcelWraps group in the left-hand sidebar of the Administration dashboard. To locate the link, you may have to expand the group by clicking on the little arrow that points to the right if the group is collapsed, but down if it is expanded.

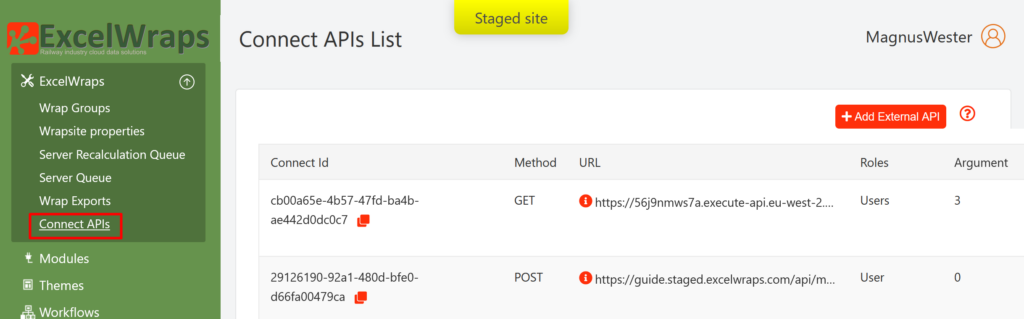
ExcelWraps provides a simple but very secure method for connecting a wrap to a remote system called WrapConnector. The list of defined WrapConnectors contains the predefined tokens that allow ExcelWraps to make secure machine-to-machine connections to other systems without requiring repeated manual logins. Read more about how WrapConnector works.
The Add External API button allows you to define additional connections.
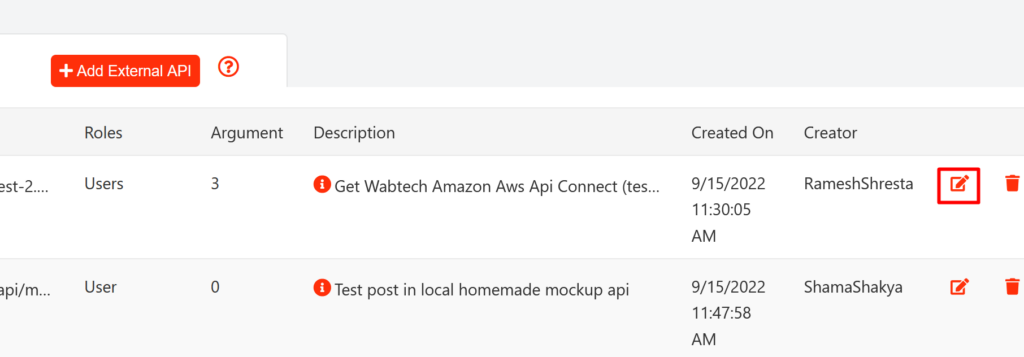
The rows are long and there is an “edit” icon on the right-hand side that you can click on to edit the details of each existing connection.
The Save Connect APIs screen contains the details for each External API. The same screen is used to add new or edit existing connections. This section contains a description of the various API parameter fields. If you need help connecting to a remote system, please contact Client Services.
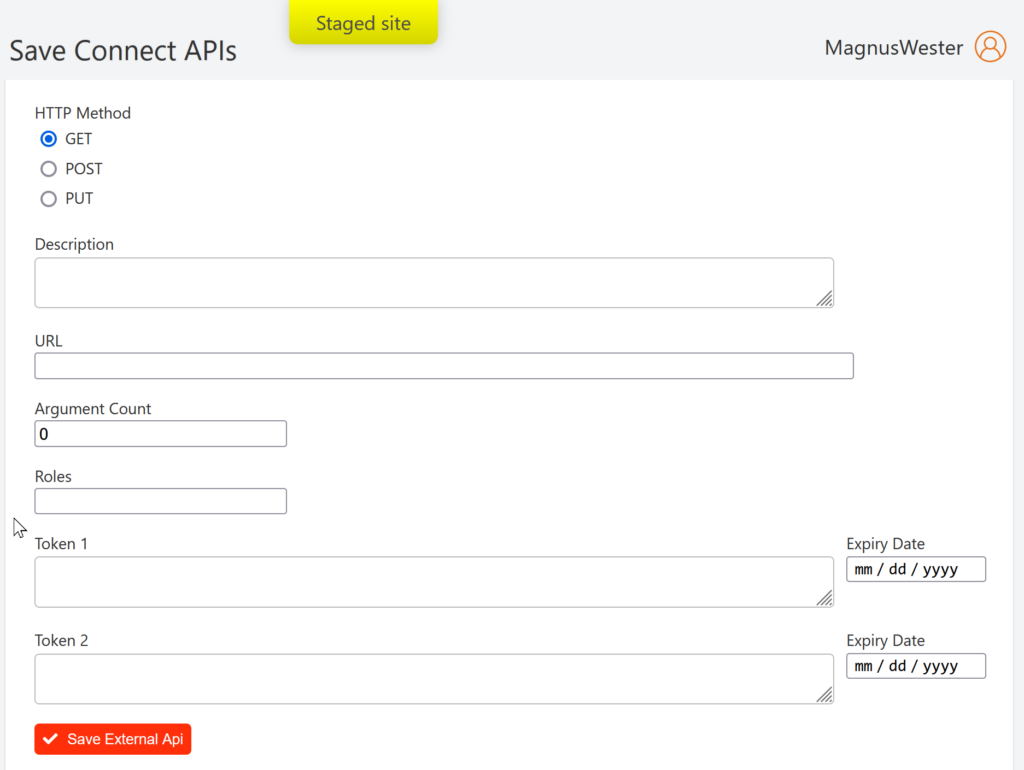
The Connect ID is an internal reference to this specific connection. It is created when you first define the API and referred to by any wrap that wishes to use the API. The call to the API from the wrap includes a fixed number of arguments that are taken from cells in the wrap, e.g. identities, quantities, or costs.
Select the HTTP method expected by the remote system. In most cases, POST or PUT are used to initiate some kind of processing, e.g. to tell a tool what to do. GET is typically used to read values from the remote system, e.g. to fetch results returned by the tool.
Describe this WrapConnector’s purpose and what the remote system is used for.
The link to the remote system is provided here. Omit the protocol part and start with the domain name. If the link contains arguments, e.g. identities, quantities, or costs, they can be taken from cells in the wrap. If so, use placeholders to represent these cells in the link, e.g.
www.crane.com/api/programwrench?wrenchid={1}&torque={2}
When this call is made, the first argument from the wrap is inserted instead of “(1)”, the second argument instead of “(2)”, etc.
A placeholder can be used more than once in the link.
This is the number of parameters/placeholders required by the link. In this example, it would be set to 2.
Specify the user roles that have access to this WrapConnector in a comma-separated list without spaces. The user must have at least one of these roles to be eligible to make the connection.
“mechanics,welder”
If you restrict the API call to certain user roles, please ensure that all these roles also have access to the wrap itself.
Provide at least one active authorization token from the remote system together with its expiration date. Since the connection will be disabled if there is no working token, we recommend that you use two tokens, of which at least one always is active. If a token expires, you should have a process in place to generate a new one and paste it here as the new fallback token before the other token also expires.
The expiration process is defined by the issuer of the token. Often, tokens expire at midnight local time on the beginning of the designated date, with the date designating the first day that the token is invalid. For details, please contact the issuer of the token.
The expiration dates make it easier for you to remember when to request new tokens but are not used to validate them. If a connection is refused, ExcelWraps always tries also with the other token, regardless of the date set for each token.
There is a group of settings on the Administration dashboard > Settings > ExcelWraps that control Wrap administration.