Each Wrapsite must define the users that have access to its wraps. User Roles and Workgroups are used for access control. User-related settings define rules for User registration, passwords etc.
User accounts are maintained separately per Wrapsite. User accounts have a unique username and password to access the Wrapsite.
User profiles add extra user information (e-mail address, address, telephone, etc). The User-related Wrapsite settings are described at the end of this document and control things such as password rules and the User registration process.
Users are assigned one or more Roles. Users may belong to a Workgroup.
To learn more about access control, visit the help page about the ExcelWraps permissions model.
Many system events related to Users can be logged in the Audit Trail: login/logout, failed login, password change, lost password, etc.
The Audit Trail can also register every time you create, edit, or delete a Role, or grant/revoke a Role for a User.
Users are an integral part of the ExcelWraps permissions model. You define your users on your Wrapsite’s Administration > Users page.
The first character needs to be a letter, and the remainder either alphanumeric, or underscore (_).
The minimum length is 2 characters, and the maximum length is 255 based on business rules.
A_
b_
cc
cA
IamAValidUserName1234
a (too short)
1forall (starts with a number)
Iamnot-valid (contains a hyphen)
I contain invalid spaces (contains spaces)
What+IsThis (contains a plus sign)
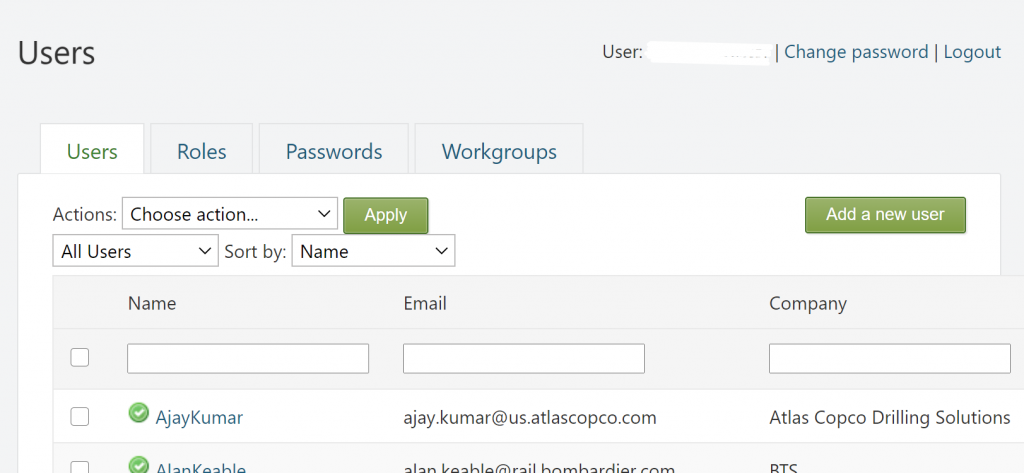
The Apply button performs the action selected in the Actions menu for the selected Users. The possible actions are:
The monthly fee for ExcelWraps is based upon the count of approved/enabled users. Users that are disabled cannot log in and aren’t charged for.
The Filter setting allows you to show all approved users, users that are pending approval, or users that have been sent a verification e-mail but not clicked on the verification link yet. The Sort by setting allows you to order the Users by Name, E-mail address, or the time for their most recent login. Press the Filter button to apply the filter and sorting settings and refresh the list of Users.
Click on the Add a new user button to define a new user of the Wrapsite.
The search boxes are used to find Users by filtering the corresponding column – just enter a part of the expected value for each applicable column and press Filter.
The checkbox in the column header selects all Users.
The Name column contains the name of the User.
The Email column contains the User’s e-mail address.
The Company column shows where the User works.
The Location column contains the name of the city where the User’s office is located.
The Roles column contains the Roles assigned to the User.
The Workgroup column contains the name of the User’s Workgroup.
The Actions column allows you to edit the User properties described below, or to Disable the User from logging in.
The Last Login Time column contains a timestamp for the User’s most recent login.
If you click on the name of a User, the Edit User window opens with the User’s properties.
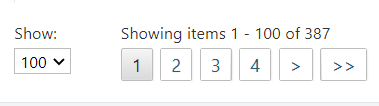
The number of items per page is controlled by the Show parameter at the bottom of the list. If the number of items exceeds this setting, a page navigation control appears to the right of it, allowing you to navigate directly to the page you want.
Clicking on the Edit link for a User allows you to modify some of the User’s properties:
The Roles defined on the Roles tab (see below) appear on the detail page for each User. To assign a Role to a User indefinitely, tick the corresponding checkbox.
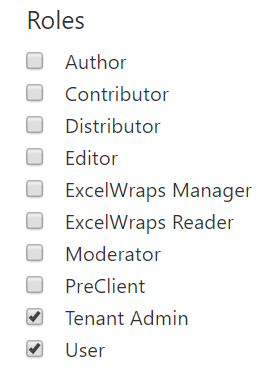
If one or more roles aren’t visible here, you may need to check your settings. The roles that are assignable to Users are globally controlled by Settings > ExcelWraps > Assignable Roles Pool, and you select the assignable roles per Workgroup in Users > Workgroups > Assignable Roles.
You can dynamically assign Roles from a Competence Wrap using the UserRole function. If a User has been dynamically assigned a Role, it has an automatic expiration date instead of the tick in the box that the permanent Roles have. The User in the screenshot below has the Client Role until the expiry date, and the C-Mech Role until it is revoked.
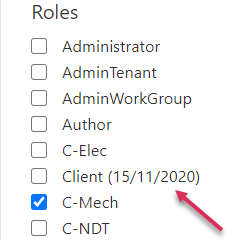
If you tick the checkbox for a dynamic Role, you disable the automatic expiration and the Role becomes permanent – the User retains the Role until you untick the box. If the box is not ticked, or if you tick it and then untick it, the User still retains the Role until it expires automatically. The help for the UserRole function describes how to remove a dynamic Role.
When a new User is registered in ExcelWraps, he/she is not assigned to any workgroup and the Workgroup setting says None.
To assign a User to a particular Workgroup, select that group in the list.
User passwords are defined when you register a new User. The formatting rules for passwords are documented under Passwords below. You can change a user’s password on the Passwords page described below.
Roles are an integral part of the ExcelWraps permissions model. You define your Roles on your Wrapsite’s Administration > Users > Roles page.
Adding a new role here does not necessarily make it visible in all lists of roles. When you assign permissions for Wrapgroups, the visibility of Roles is controlled by Settings > ExcelWraps > Displayed Roles. The roles that are assignable to Users are globally controlled by Settings > ExcelWraps > Assignable Roles Pool, and you select the assignable roles per Workgroup in Users > Workgroups > Assignable Roles.
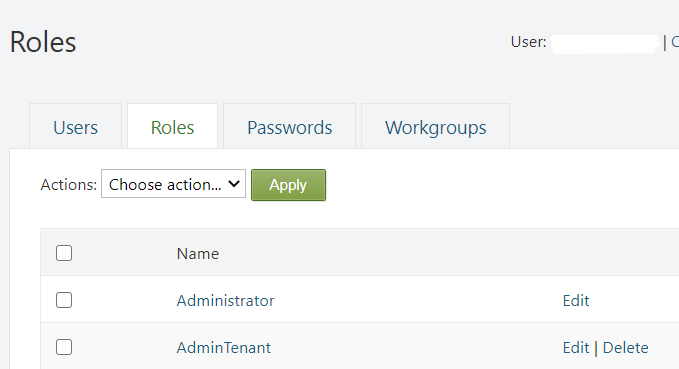
The Apply button performs the action selected in the Actions menu for the selected Roles. The only possible action is Delete which disconnects all Users from the Role and removes the Role definition. Note that this is an extremely rare action. You will have to manually grant the Role to all the applicable users again if you ever want to undo the delete.
Click on the Add a role button to define a new Role.
The checkbox in the column header selects all Roles.
The Name column contains the name of the Role.
The Actions column allows you to edit the Role properties described below, or to delete the Role.
If you click on the name of a Role, the Edit Role window opens with the Role’s properties.
The number of items per page is controlled by the Show parameter at the bottom of the list. If the number of items exceeds this setting, a page navigation control appears to the right of it, allowing you to navigate directly to the page you want.
Clicking on the name of a Role in the list allows you to modify some of the Role’s properties:
You may want to assign some extended ExcelWraps permissions to particular Roles. In this case, scroll to the MoreVision.ExcelWraps Feature section and tick the ExcelWraps feature permissions required for the Role.
Passwords are used to protect user identities as an integral part of the ExcelWraps permissions model. A password is set for each User when they are defined. You can change User passwords on your Wrapsite’s Administration > Users > Passwords page.
By default, passwords must be at least seven characters long. They must contain at least one uppercase letter, one lowercase letter, one digit, and one special character. The special characters that you may use in passwords are
!@#$%^&*(){}[].
You can define local password rules at Administration dashboard > Settings > Users > Passwords must meet Custom requirements.
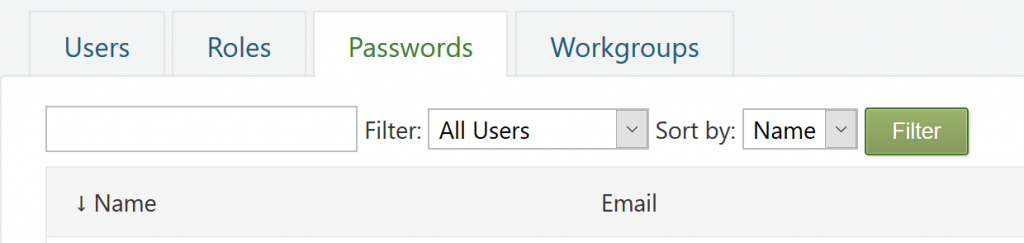
The search box is used to find Users by name or e-mail address – just enter a part of the name or e-mail address and press Enter. The Filter setting allows you to show all approved Users, Users that are pending approval, or Users that have been sent a verification e-mail but not clicked on the verification link yet. The Sort by setting allows you to order the Users by Name or E-mail address. Press the Filter button to apply the filter and sorting settings and refresh the list of Users.
The down arrow in the column header selects all Users.
The Name column contains the name of the User.
The Email column contains the User’s e-mail address.
The Actions column allows you to change the password for the User.
If you click on the name of a User, the Change Password window opens.
The number of items per page is controlled by the Show parameter at the bottom of the list. If the number of items exceeds this setting, a page navigation control appears to the right of it, allowing you to navigate directly to the page you want.
Clicking on the Change Password link for a User allows you to change the User’s password. The formatting rules for passwords are described above.
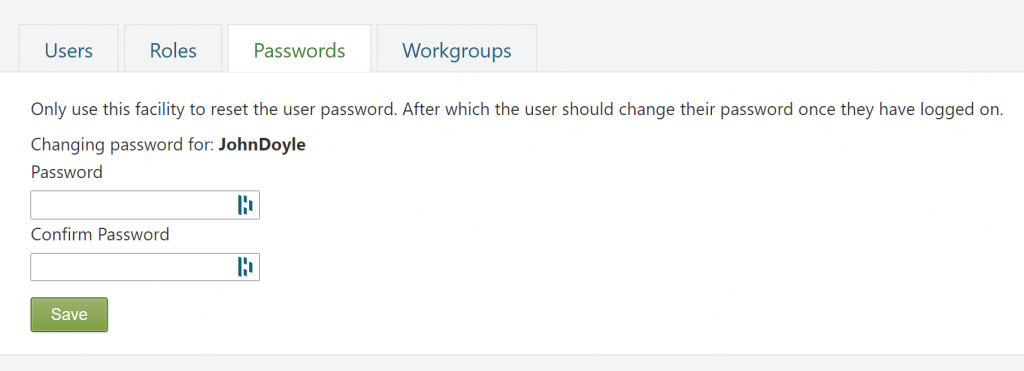
In the form, assign a temporary password for the user and enter it again in the second field to avoid typing errors, then press Save.
Instruct the user to log in using the temporary password, then change it again to ensure that each user has a password that cannot have been intercepted in transit and isn’t known to anyone else.
Workgroups are an integral part of the ExcelWraps permissions model. You define your Workgroups on your Wrapsite’s Administration > Users > Workgroups page.
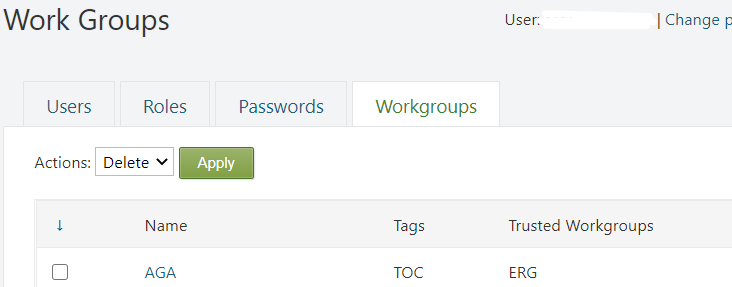
The Apply button performs the action selected in the Actions menu for the selected Workgroups. The only possible action is Delete which disconnects all users from the selected Workgroup and removes the Workgroup definition. The Users in the Workgroup are not deleted.
Click on the Add button to define a new Workgroup.
The down arrow in the column header selects all Workgroups.
The Name column contains the name of the Workgroup.
The Tags column contains the tags used to select this Workgroup when it is trusted with an instance belonging to another Workgroup.
The Trusted Workgroups column contains the names of the Workgroups that this Workgroup permanently trusts with access to its Wraps.
If you click on the name of a Workgroup, the Edit Workgroup window opens with the Workgroup’s properties.
The number of items per page is controlled by the Show parameter at the bottom of the list. If the number of items exceeds this setting, a page navigation control appears to the right of it, allowing you to navigate directly to the page you want.
Clicking on the name of a Workgroup in the list allows you to modify some of the Workgroup’s properties:
Remote systems can establish machine-to-machine connections to ExcelWraps to store data, obtain reports or initiate wrap-driven functions. ExcelWraps supports standard “bearer” or “token-based” HTTP authentication and provides a simple way for other systems to obtain the authorization tokens they need to authenticate themselves as legitimate users of ExcelWraps.
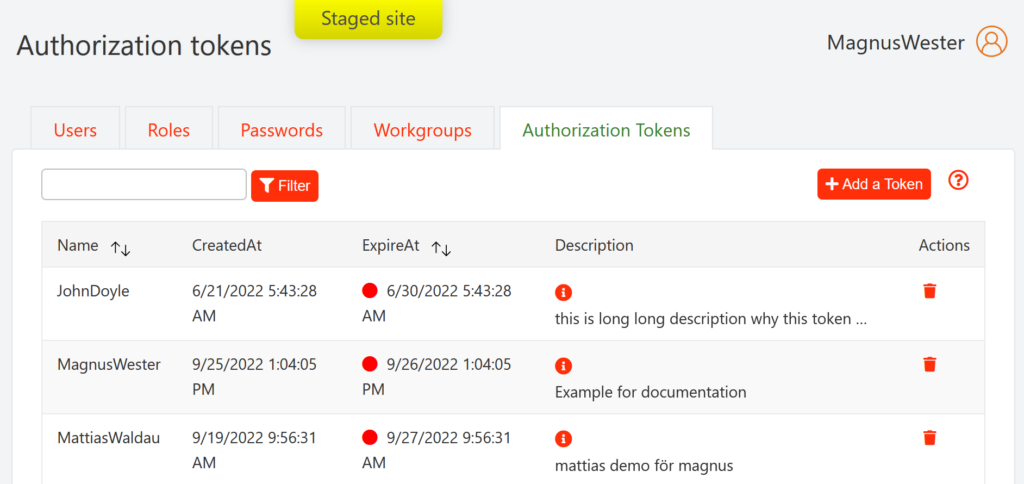
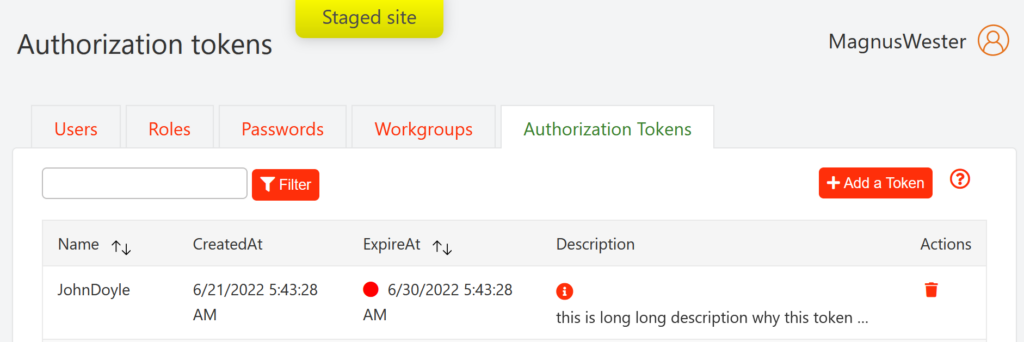
In the list view, you see the tokens that have previously been generated. Each token represents an ExcelWraps user login.
You should never create a token for your own user ID. To reduce the risk of intrusion, each remote system should only have access to its own special user ID in ExcelWraps and this reserved user ID should only have the minimum permissions required by the remote system. As an example, a time-tracking application may have permission only to fetch data but not to create, edit, or delete wraps.
Use the Filter box to reduce the length of the token list. You can filter either on the user name or the description.
Press Add a Token to create a token for a remote system. This will take you to the User list described below.
This is the user ID that will be logged in for connections using this token.
This field contains the time when ExcelWraps generated the token.
The time when ExcelWraps will stop or has already stopped accepting the token. Tokens always expire at midnight, UTC. The remote system should have an alternate fallback token to use when the currently active one expires, and the fallback token must have a later expiration date than the previously active one.
This field should describe the remote system and what it will use the connection for.
You can remove an authorization token from ExcelWraps by clicking on its wastebin symbol. This immediately expires the token. ExcelWraps will reject all future connection attempts using this token.
Authorization tokens can only be created for existing users. Before you create a token, consider defining a unique user per remote system, and giving this user only the minimum permissions required for that specific client.
Press Add a Token on the token list to add a new token. This takes you to the user list, where you select a user and generate a token for them.

Use the Filter box to reduce the length of the user list. You can filter either on the user name or the e-mail address.
To create a new token, click on the Create token link for the designated user.
Creating an authorization token for a user allows any system with the token to login to ExcelWraps as this user. Generating a token is fast and free of charge.
Please consider the security implications. If someone gets hold of the token without your knowledge, this makes them able to perform anything malicious that is permitted for that User ID.
Here is an example of an ExcelWraps Authorization Token:
PtHXdV_RLTXc4S0cMKdZe1mPzLQBPFwTiKreKwJq7NJGWEtaz8Eb94ORh3lM5b2f6Ys_anSOc2vDLoQxxNV485QsnPiDgswNsy3nyWNglEKWEzHoKaPvbijqO58eYaSlWsOIk2CjHJWWeTtxEYG0_BQxVXDqwUuNmnrxXQ5Cz98
It is a randomly generated, unique character string that is impossible to guess. Given enough time, it could be possible for a computer to guess authorization tokens until it finds a match. Still, it is estimated that by the time the token is found, it is no longer in use. Each token has an expiration date that ensures that it is used only during a period that is considerably shorter than the time it would take to find it by guessing.
(Note that showing this specific token in clear text above means that security has been compromised. The above token is no longer secret and can no longer be used for secure authentication.)
Setting a short expiration period gives an intruder very little time to match the token using brute force, repeatedly testing new combinations. Setting a long expiration period means you don’t have to spend time creating and exchanging new authorization tokens to increase security. It is hard to give general recommendations since the length of the expiration period will depend on the security requirements. It is unlikely that you will use expiration periods shorter than 7 days, or longer than 90 days.
Describe the remote system and what it will use the connection for.
Press Create Token to generate a new authorization token for the designated user. The generated token is saved for the user and cannot be changed. If you need a new token before the old one has expired, just create another one.
Press the Copy button to copy the authorization token to the clipboard. You must press the Copy button. There is no other way to obtain the text of an authorization token. If you don’t press the Copy button now and save each new authorization token, you must start over and generate a new one.
Again, use an encrypted chat to forward the token to the remote system that will use it to login to ExcelWraps.
There is a group of settings on the Administration dashboard > Settings > Users that control User administration.