The start page for your wrapsite provides information your users need. It allows you to define and link to the wraps and reports they use. You can manage your user list and set up MyWrap reports. This help page describes how you maintain the wrapsite start page.
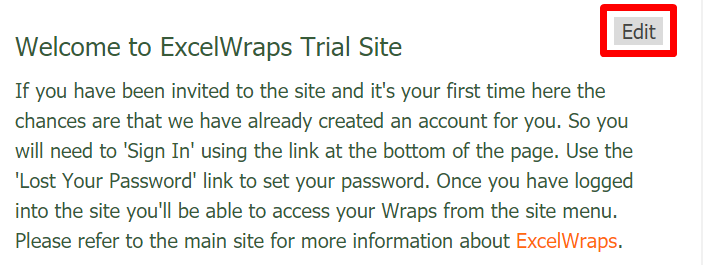
When users log in to their wrapsite, they get to a start page with general information about the wrapsite and links to the wraps and reports they will use.

As an Administrator, you can edit all pages on your Wrapsite. Just navigate to the right page and click on the small Edit links to the right.
The corresponding section of the page will open in the built-in editor.
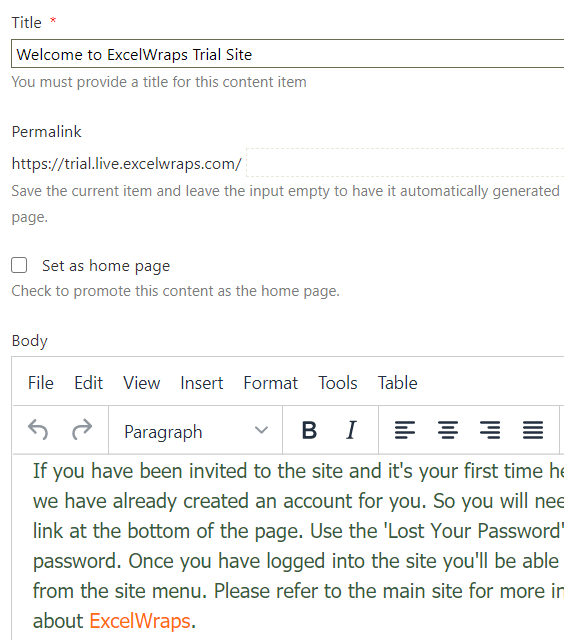
Make the changes you want and then click Publish Now to save your changes. You can also Save your changes as an unpublished draft, or Publish Later at a predefined date and time.

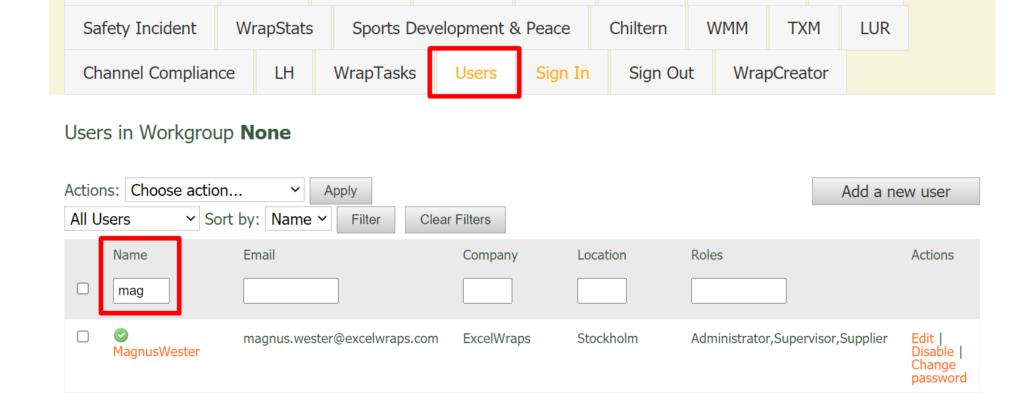
Your wrapsite can be set up to let you manage users directly from a Users tab on the start page.
If there is no Users tab on your wrapsite, it may not have been set up for you, or you don’t have the permission to use it. Please contact your wrapsite administrator or ExcelWraps client services if you need help with this. You may still be able to add or edit user definitions on the User Administration page of the Administration dashboard.
The Apply button performs the action selected in the Actions menu for the selected Users. The possible actions are:
The monthly fee for ExcelWraps is based upon the count of approved/enabled users. Users that are disabled cannot log in and aren’t charged for.
The Filter setting allows you to show all approved users, users that are pending approval, or users that have been sent a verification e-mail but not clicked on the verification link yet. The Sort by setting allows you to order the Users by Name or E-mail address. Press the Filter button to apply the filter and sorting settings and refresh the list of Users. Press Clear Filters to remove all filtering here and in the list header, and show all users in alphabetical order by user name.
Click on the Add a new user button to define a new user of the Wrapsite.
The search boxes are used to find Users by filtering the corresponding column – just enter a part of the expected value for each applicable column and press Filter.
The checkbox in the column header selects all Users.
The Name column contains the name of the User.
The Email column contains the User’s e-mail address.
The Company column shows where the User works.
The Location column contains the name of the city where the User’s office is located.
The Roles column contains the Roles assigned to the User.
The Actions column allows you to edit the User properties described below, Disable the User from logging in, and change the user’s password as described below.
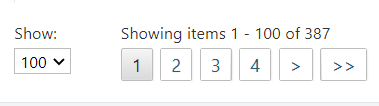
The number of items per page is controlled by the Show parameter at the bottom of the list. If the number of items exceeds this setting, a page navigation control appears to the right of it, allowing you to navigate directly to the page you want.
If you click on the name of a User, the Edit User window opens with the User’s properties.
Clicking on the Edit link for a User allows you to modify some of the User’s properties:
The Roles defined on the Administration dashboard > Users > Roles page appear on the detail page for each User. To assign a Role to a User indefinitely, tick the corresponding checkbox.
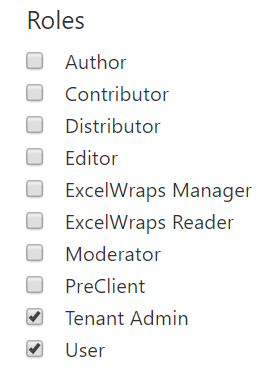
If one or more roles aren’t visible here, you may need to check your settings. The roles that are assignable to Users are globally controlled by Administration dashboard > Settings > ExcelWraps > Assignable Roles Pool, and you select the assignable roles per Workgroup in Administration dashboard > Users > Workgroups > Assignable Roles.
You can dynamically assign Roles from a Competence Wrap using the UserRole function. If a User has been dynamically assigned a Role, it has an automatic expiration date instead of the tick in the box that the permanent Roles have. The User in the screenshot below has the Client Role until the expiry date, and the C-Mech Role until it is revoked.
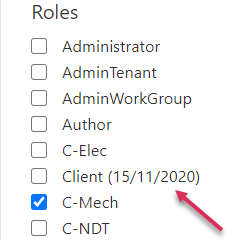
If you tick the checkbox for a dynamic Role, you disable the automatic expiration and the Role becomes permanent – the User retains the Role until you untick the box. If the box is not ticked, or if you tick it and then untick it, the User still retains the Role until it expires automatically. The help for the UserRole function describes how to remove a dynamic Role.
When a new User is registered in ExcelWraps, he/she is not assigned to any workgroup and the Workgroup setting says None.
To assign a User to a particular Workgroup, select that group in the list.
Workgroups are defined on the Administration dashboard > Users > Workgroups page
User passwords are defined when you register a new User. The formatting rules for passwords are documented below. You can change a user’s password by clicking on the Change password link in the user list described above.
Clicking on the Change Password link for a User in the user list allows you to change the User’s password.
By default, passwords must be at least seven characters long. They must contain at least one uppercase letter, one lowercase letter, one digit, and one special character. The special characters that you may use in passwords are
!@#$%^&*(){}[].
You can define local password rules at Administration dashboard > Settings > Users > Passwords must meet Custom requirements.
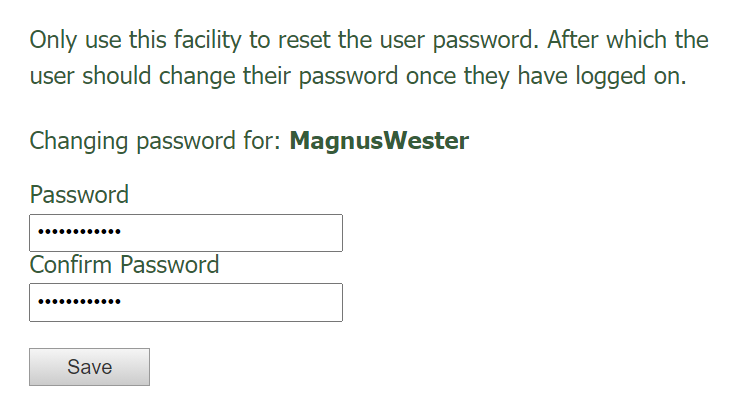
In the form, assign a temporary password for the user and enter it again in the second field to avoid typing errors, then press Save.
Instruct the user to log in using the temporary password, then change it again to ensure that each user has a password that cannot have been intercepted in transit and isn’t known to anyone else.
To simplify your dealings with ExcelWraps Client Services, we provide a support task system called WrapTasks on every Wrapsite.

If there is no WrapTasks link on your Wrapsite start page, you can find WrapTasks at https://<company>.live.excelwraps.com/Wraps/WrapStats.
The Manage Users button takes you to the Administration dashboard > Users page.
The Users list shows you the billable users of the wrapsite.
The WrapTasks list contains your current support tasks. There is a description of the fields in a WrapTask below. Use the Raise New Task button to add new tasks to the list.
When a task has been finished and should be invoiced, it ends up on the Tasks billed this month list for you to verify.
For statistical purposes, we provide three simple trend charts to give you more control over your costs:
The Task tab describes the work to be done. It names the person responsible for the task on your end and who will do the testing.
The Discuss tab provides a convenient common location for questions and answers related to the task
The Quote tab describes the work to be done and the requested price.
You use the Client Approval tab to sign off quotes from us.
The Completed tab provides information related to the completion of the task.
You use the Client Close Out to sign off the completed task.
The Historic tab contains numbers related to statistics and billing. There is one column per month with the users and tasks affected by the monthly invoice.
WrapTasks is a standard ExcelWraps application. You can use MyWraps to pull any reports you want out of the WrapTasks system, e.g. a list of previously closed tasks.