This help page describes the end-user interface for a wrap created by WrapCreator and uploaded to a Wrapsite – how wraps look for users.
Wraps are created from Excel templates using WrapCreator. The converted result is uploaded as a web app to your Wrapsite, where it connects to the ExcelWraps database and to the other wraps in your system. You start a wrap by clicking on a link to it.
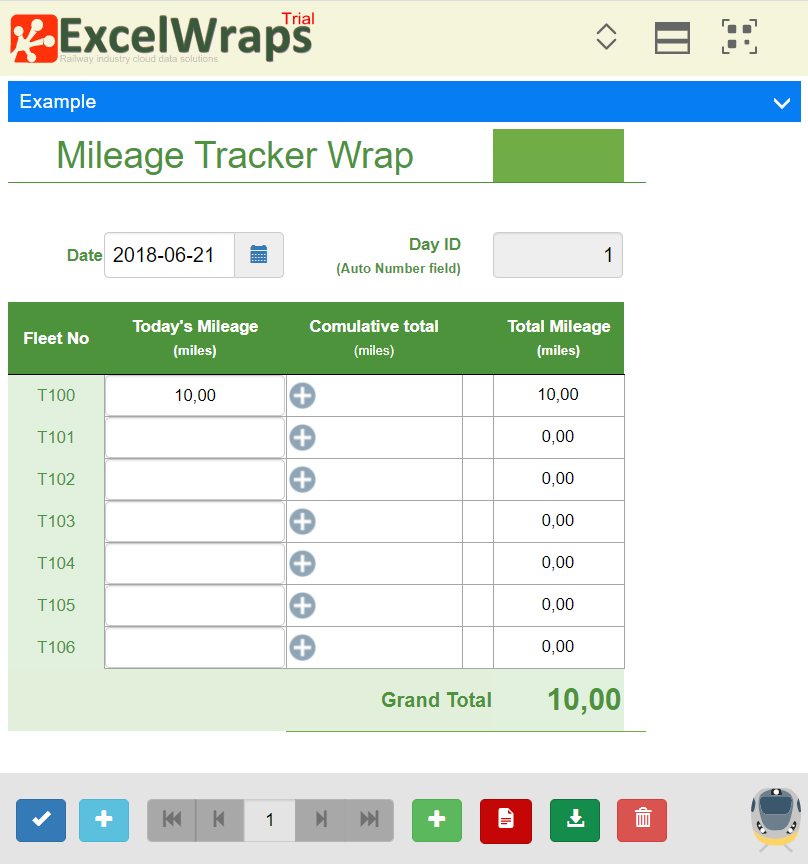
The appearance of a wrap is slightly different on narrow, medium, and wide screens. The screenshot below is from a medium-width screen.
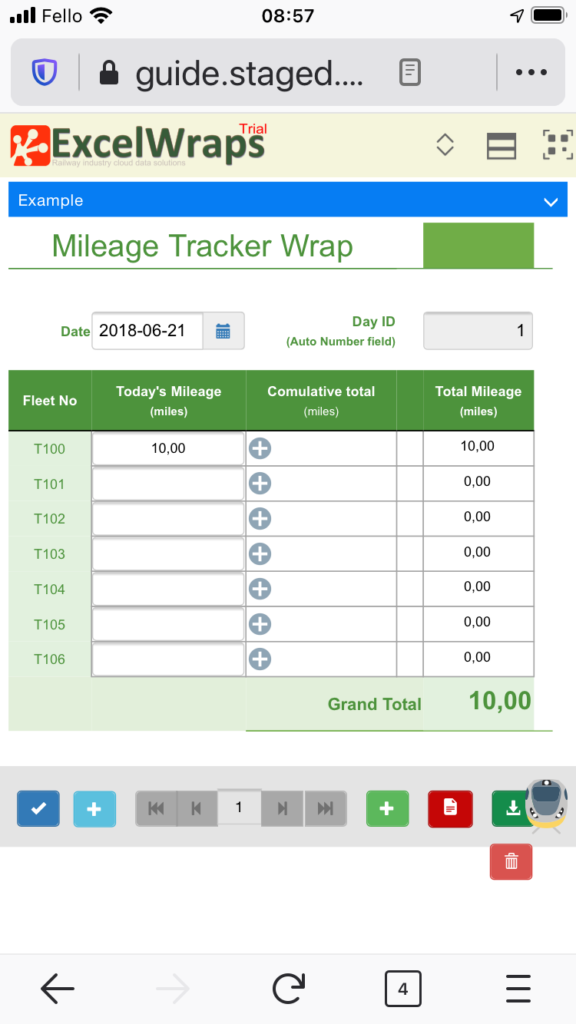
On a narrow screen like on a phone, the wrap is slightly more compressed, and the icons in the toolbar no longer fit on a single row. This may serve as a reminder not to design wraps in landscape mode that only works on desktop widescreens, but in portrait mode that works well on all screens.
The display of a wrap has four main visual components:

In the header at the top of the page, the Wrapsite logo will be at the top left.
Clicking on the wrapsite logo returns to the wrapsite without saving the changes you have made.
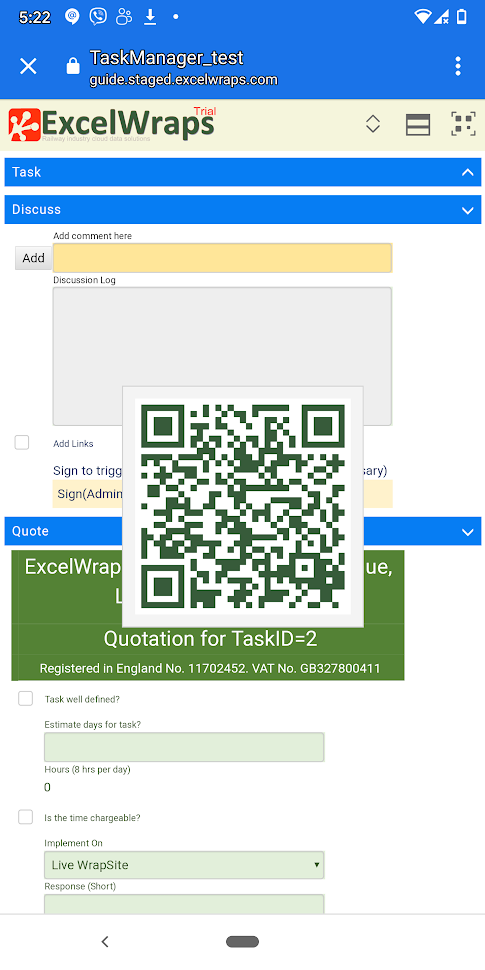
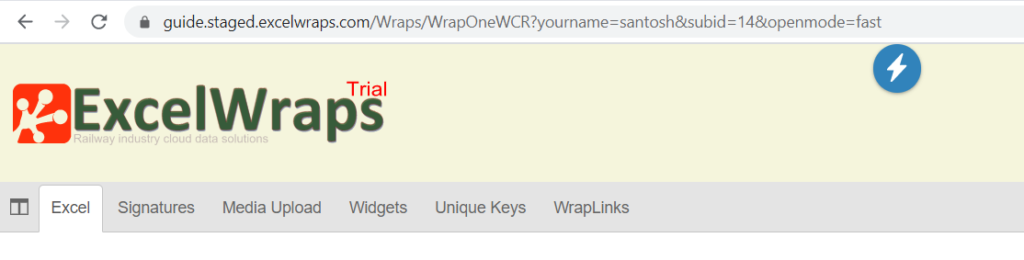
ExcelWraps is very easy to use on mobile devices. If you have a wrap open on one device, and want to open it on another, you can click on the QR code button to display a link to the wrap in barcode format. If you scan this QR code with the camera of another device, it can decode the link and open the wrap in a web browser. If you aren’t already logged into the wrapsite, you need to provide your user credentials on the mobile device before you can access the wrap.
To see this in action, scan the QR code in the screenshot below with your phone’s camera.
If the wrap has more than one visible tab, a header for each tab will appear on the screen.
To better exploit screen width and network bandwidth, wraps with multiple tabs can be shown in three different layouts. You select the layout using the button that looks like a window.
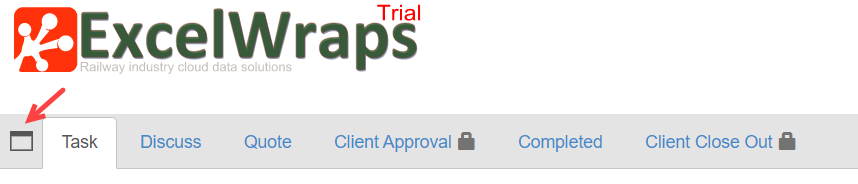


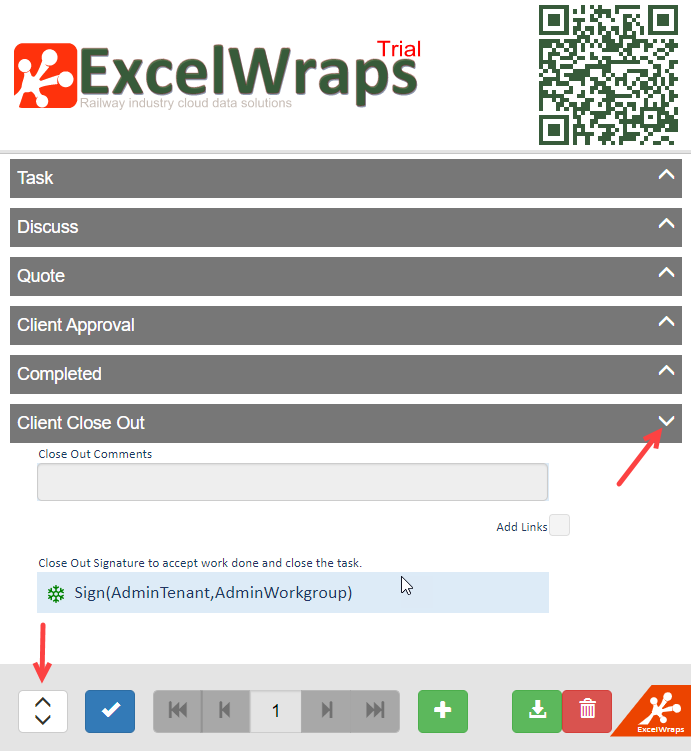
The button with arrows (left/right if the multi-tab layout is available, up/down in the accordion layout) can be used to expand (open) or collapse (close) all the visible tabs.
A wrap is a web application designed to support a certain business process. Each tab in a wrap contains cells (we use the Excel name for them but you may prefer to call them fields) that were put there by a wrap designer in a way that was considered useful to the users of the web app. If you don’t understand what to use a particular field for, or have a suggestion for improvement, please contact your local wrapsite administrator. It is easy to customize wraps to local requirements.
At the bottom of the wrap window, you will find a toolbar that provides navigation buttons and a few other helpful functions. The buttons in the toolbar vary depending on the type of wrap and the permissions granted to you.
There are a few special kinds of wraps that you can recognize from the toolbar:


We use visual cues to alert you about the status of certain things.
An intermediate signature is used to sign off a unit of work as completed.
![]()
When an intermediate signature has been made, it shows the username and timestamp.
![]()
When a signature marks the completion of a unit of work and locks the wrap for further updates, the signature cell has a green “freeze” icon.

When a wrap is frozen, the signature that locked the wrap has a blue “frozen” icon.

If a signature cell is grey, it means you cannot sign it because you lack the required authority. Please contact your local wrapsite administrator if you feel you should be able to sign a particular processing step.

If the rules that enable the signature have changed since the wrap was signed, the signature is prefixed by an apostrophe. Read more on the help page about Making changes to your wraps.
![]()
If the rules that enable the signature have changed since the wrap was signed, and the signature would not have been permitted with the new rules, a red border appears around the signature field. Read more on the help page about Making changes to your wraps.
![]()
If you open a wrap where one or more tabs are locked (visible but read-only), a lock icon appears to warn you that you will not be able to make changes to the content of these tabs. Please contact your local wrapsite administrator if you feel you should have access to any protected parts of a wrap.
![]()
If you open a frozen wrap that cannot be updated, a blue “frozen” indicator appears at the top of the page. Please contact your local wrapsite administrator if you feel that a wrap has been frozen by mistake, to have the wrap unlocked again

If you open a wrap in read-only mode, an icon appears to warn you that you will not be able to save any changes. Please contact your local wrapsite administrator if you feel you should have access to a read-only wrap.

If you open a wrap that has not been recalculated, a flash icon appears. This says that the wrap may show different values if recalculated, but that since recalculation is a slow process, it was considered unnecessary for your use of the wrap. Please contact your local wrapsite administrator if you feel the wrap should have been recalculated before it was opened.
When you copy data between two windows, you usually copy one field at a time, paste it in, then go back to fetch the next field. If there is a lot of data to copy, e.g. many rows and columns in a table, copying one field at a time can be very time-consuming.
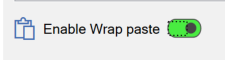
If you are copying data from Excel to a Wrap, ExcelWraps allows you to save time by copying larger chunks of data at the same time. To enable this feature you must select the Enable Wrap paste option on the Wrap tab of the task pane before you convert the spreadsheet.
ExcelWraps has special support for tabular data in rows and columns that comes from Excel. If you copy a cell range in Excel and select an input field on a Wrap, all the fields that will be affected by the paste operation will be highlighted. The highlighted area always has the same proportions as the cell area in Excel, so if you copy a 2×2 area like C3:D4, you can only paste these four fields into a 2×2 selection of input fields on the Wrap.
In the screenshot below, we copied a 3×3 cell area from Excel, then placed the cursor in one of the input fields of a Wrap. As you can see, the highlighting clearly shows you what fields will be affected by the area paste. Notice that the right-most column – the one with the sixes – is unaffected by the 3×3 range that is being copied.
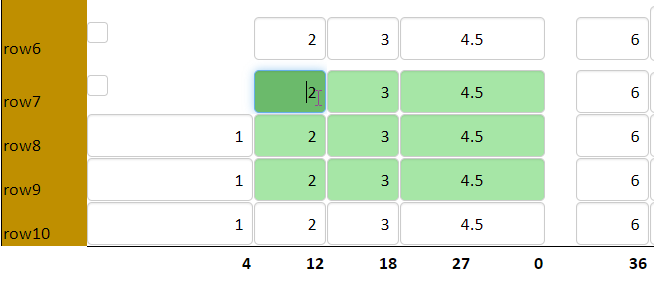
When you’re happy with the selected field range, just press Ctrl-V to replace the content of the highlighted fields with the corresponding contents from Excel.
Upon completion of the paste operation, the Wrap is automatically recalculated.
You can only paste into fields that are open for input. Only three field types are currently supported: Wrap input, Text widget, and Dropdown widget.
The input fields that we paste into don’t have to be absolutely next to each other. You can have intermediate sections of field labels, calculated output cells or other unsupported field types, or blank rows and columns. Just verify that you accept the automatic selection of fields to paste into before you press Ctrl-V.
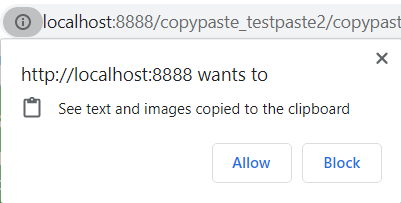
For security reasons, your web browser may be protecting the data on the clipboard. In this case, it will issue a prompt the first time you select an input field in the Wrap. Click Allow or similar to enable the Wrap to see if you have prepared for an area paste.
Wrap paste may run out of fields to paste into. This can happen when the cell range on the clipboard contains more rows or columns than are available in the Wrap, starting at the currently selected input field.
Example: You have copied an area from Excel that is 5 columns by 5 rows, but starting from the current field, only a three-column range of input fields can be pasted. In this case, you get a warning message.
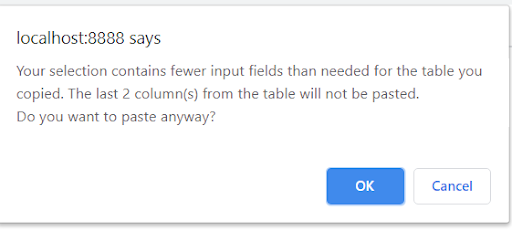
If you press OK, you will lose the two right-most columns of data that you copied from Excel. If you expected the cell range in Excel to fit nicely into the input fields of the Wrap, you may have selected the wrong input field to start the paste operation from.
Once you’ve pasted a cell range into the Wrap, you cannot paste it again. This is to protect you from accidentally pasting the same data twice, which is likely to make the contents of the Wrap invalid. You must always fetch new data from Excel before you attempt the next paste operation.