To make it easier to use a wrap, you may want to hide certain rows in the spreadsheet until a specific condition is met. You may even want to hide entire worksheets unless other settings indicate that they are relevant.
To hide rows or worksheets in a spreadsheet, you can use the Hide Rows/Sheets widget. First, you specify what parts of the spreadsheet to hide, then you set the condition that will trigger the display of the selected rows or sheets.
Note that WrapCreator offers several ways to hide or lock rows and worksheets. The HideRowIf function allows you to use Fill Down or copy/paste to quickly create a large number of hidden rows, each with its own controlling cell. You can lock or hide worksheets on the Sheets tab for users that don’t have a qualifying role. You can lock worksheets with the WrapSignOff widget or freeze the entire wrap instance when the corresponding work has been signed off.
During printing, the Print sheet setting overrides all methods of hiding sheets. Whenever at least one Print sheet has been defined, the printout or PDF will include exactly all the designated Print sheets, regardless of their visibility, and no other worksheets.
Follow the step-by-step instructions below to use the Hide Rows/Sheets widget.
Example webpage: Hide Rows Sheet
Example spreadsheet: Hide_rows_sheets.xlsx
Click on the Hide Rows Sheet icon in the Widgets tab of the task pane.
Click the Add new button.
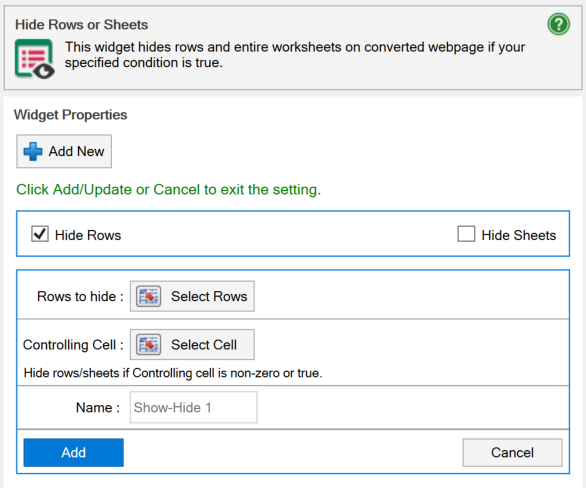
Select Hide Rows to hide rows and/or Hide Sheet to hide worksheets. If you select both options, the same controlling cell will hide both cells and worksheets.
For Hide Rows, an option named Rows to Hide will appear where you choose which rows to hide in the browser. Click on the Select Rows button and use the dialog box named Select Row range to select the range of rows to hide when a condition is true.
For Hide Sheets, an option named Sheet to hide will appear where you tick the checkbox for each sheet you want the browser to hide when a condition is true.
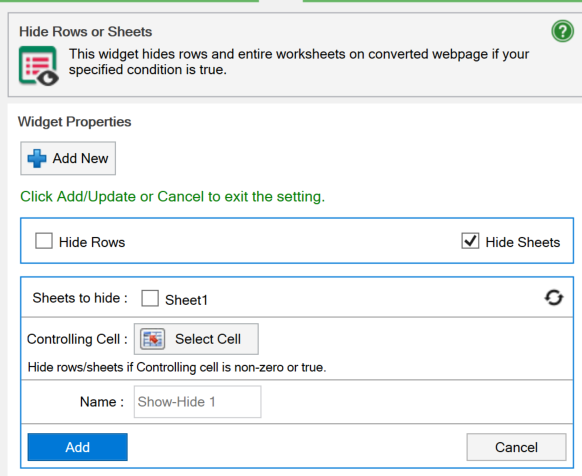
In the Controlling Cell option, select the cell which will control if the rows or worksheets are hidden or visible. If the value of the controlling cell is True or non-zero, the controlled rows and/or sheets are hidden.
The controlling cell may contain a checkbox widget, a textbox widget or any other widget that allows values to be entered.
To remember what this instance of the widget does, give it a descriptive name that tells you what you intended with the setup.
Press Add to activate the widget.
If you don’t want the controlling cell to be visible, insert a Utility Cell widget into the controlling cell and tick its option Make hidden field.
Convert the spreadsheet and test the wrap.
Click the Hide Rows/Sheet widget.
In the list of hidden rows/sheets, look for the name you provided earlier while hiding rows or sheets. If you want to edit the settings, click the name. If you want to remove the hide rows sheets instance, click on the Trash icon next to the name.

To edit a setting, click on the corresponding “pen” symbol.
The pen symbol beside the Rows to Hide option opens the Select Row range dialog box. Select the rows to hide in the worksheet if the condition is true.
The pen symbol beside the Controlling cell option opens the Select controlling cell dialog to let you select the cell which will make the worksheets or rows hidden or visible.
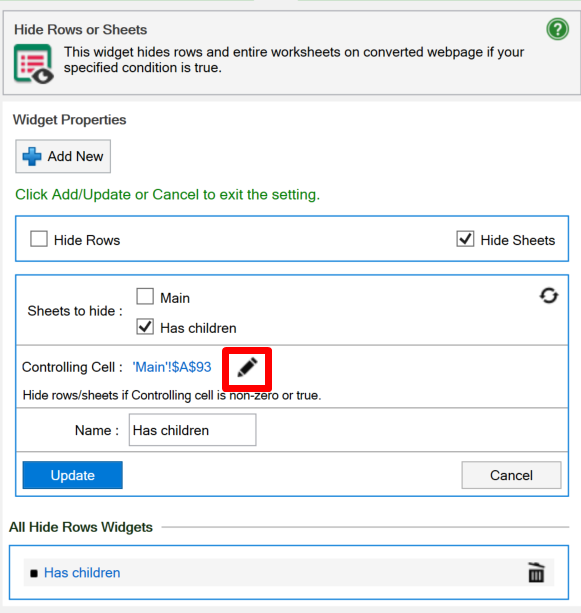
To change the sheets to hide, just check or uncheck the sheets accordingly.
Change the name of the widget instance, if required.
Click the Update button to save the updated settings.
Convert the spreadsheet and test wrap.