Instant Testing lets you quickly test each new version directly after conversion.
Instant Testing offers several time-saving services to developers:
Instant Testing helps you and other people visualize the wrap in a web browser. However, the wrap does not have any server functionality until it is uploaded to the server.
Use the Browsers and Conversion Path Option in the Options menu in the Convert section of the ribbon to select what browsers to use for Instant Preview.
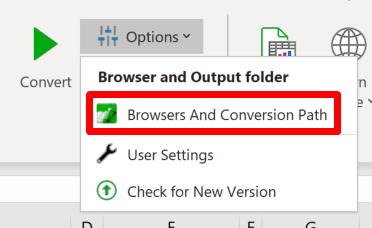
Select one or more web browsers by clicking on their icons – click once to activate a browser, click once again to deactivate. After each conversion, the converted wrap will open automatically in all the selected browsers.

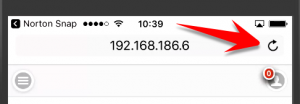
If you are viewing a converted web page from a distance on another device, you only need the address to the Instant Testing device the first time you open the page. If you already have the converted wrap open in your web browser, just press the Reload button. It is usually a circular arrow (it looks like a “rotate clockwise” symbol) and it is often located near the website address field.
During Instant Testing of a wrap, you are not authenticated and so we use defaults for your ExcelWraps user settings. If the wrap wants to know your role, you will be authenticated as a User.
The Instant Testing web server in the development workstation attempts to provide the converted web page to any computer or another device on the same network. Copy the link and send it to other devices via e-mail or messaging.
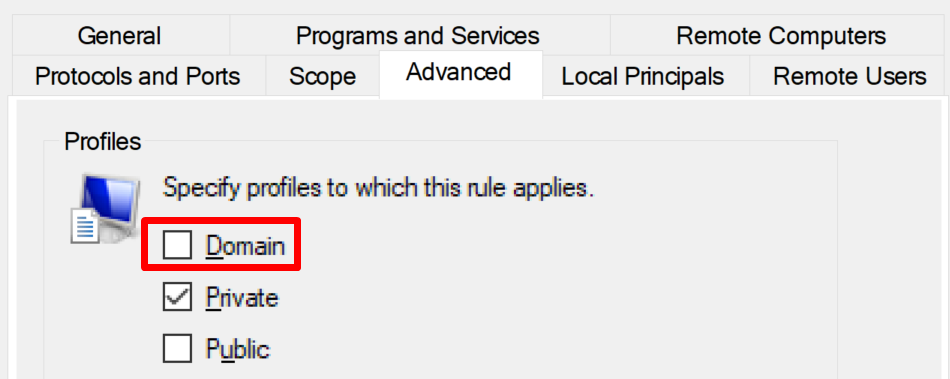
We instruct the firewall to allow access to the Instant Testing server only from Private networks, and we don’t recommend that you open it on Public networks (like at your local coffee shop). If you want to open the firewall to enable Instant Testing also from other secure, in-house networks within your corporate domain, you should open the firewall settings for Inbound connections, and locate the entry for the WrapCreator Local server. On the Advanced tab, tick the checkbox for Domain, but not for Public.
During the installation of WrapCreator, we install a tiny web server in the development environment that serves the converted wraps to web browsers in the same PC, or to other devices on the same network.
You may be unable to connect to the development environment. In this case, you may get time-out error messages in your web browser saying
You should also check the Messages tab of the task pane for error messages like these from the conversion:
If you are trying to access the web page in the development workstation from another device, you should double-check that you are indeed connected to the same network as the development workstation. Your device should typically be showing a wifi symbol for the local network – don’t try this with a phone that says it’s connected with 5G, 4G or any other “G” because it probably won’t be able to reach your local devices.
Good: ![]() Bad:
Bad: ![]()
If the link you have contains the word localhost, it can only be used on the development workstation. To use the link from another computer on the local network, you must replace “localhost” with the local network address to the development workstation. Read more under Determine the local network address below.
To access the preview web server in the development workstation, other devices need to know its network address. All computers on a network have more than one so-called IP address that can be used to refer to it. Sometimes it’s pretty easy to determine this address, but there are a number of more complex network configurations that we just cannot handle automatically.
In cases like these, we must hand the problem over to you, or someone with basic networking skills that can help you determine the correct IP address and firewall settings.
Here are the initial steps to identify the development workstation’s “true” IP address on the local network:
Hint: the link should eventually look something like this:
For Instant Testing:
http://192.168.59.2:8888/l/weekly-time-card/weekly-time-card.htm
Some overly anxious antivirus and Internet security programs may incorrectly identify portions of our product as malware. We frequently see false alarms related to the node-ssc.exe or node.exe programs, in particular from Bitdefender. If you get such messages, you may have to whitelist the program or disable the antivirus program completely while using WrapCreator.
Read more on the help page for Internet security software.
The only traffic going into your network should be things that you or someone else asked for, like web pages, downloaded files or e-mail. Your network has one or more “firewalls” that prevent unauthorized network connections to your devices. If someone on the outside attempts to connect to a suspicious program in your laptop, it’s probably a bad thing. One of the firewalls should detect and prevent this intrusion.
Most networks have a primary firewall in or near the network’s outermost router or gateway, the one that connects your network to the public Internet. Many network devices like computers and smartphones also have their own firewalls. The firewalls monitor the applications to see what network ports they open, and allow data to flow through authorized connections. Unauthorized connections are terminated.
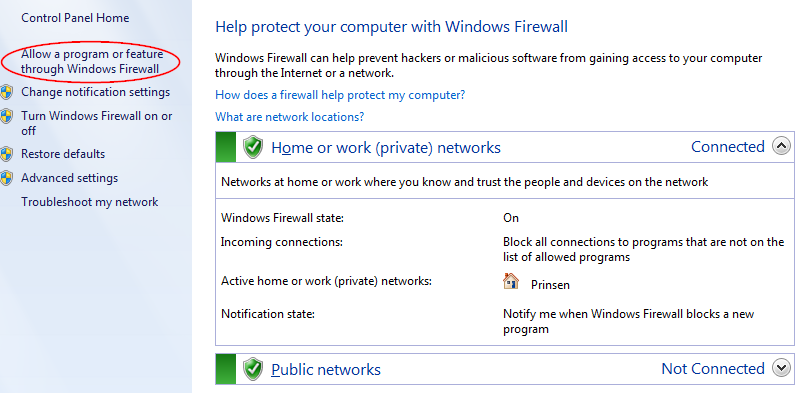
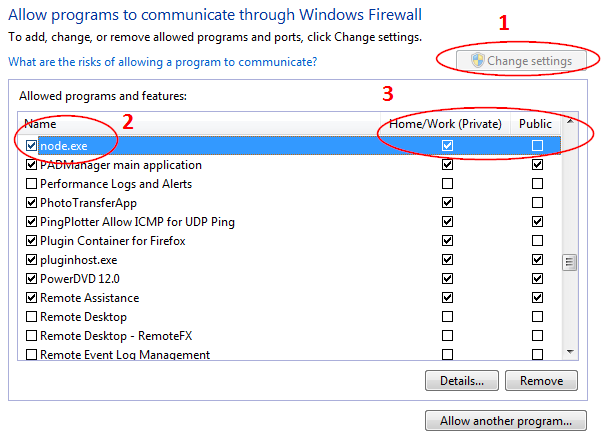
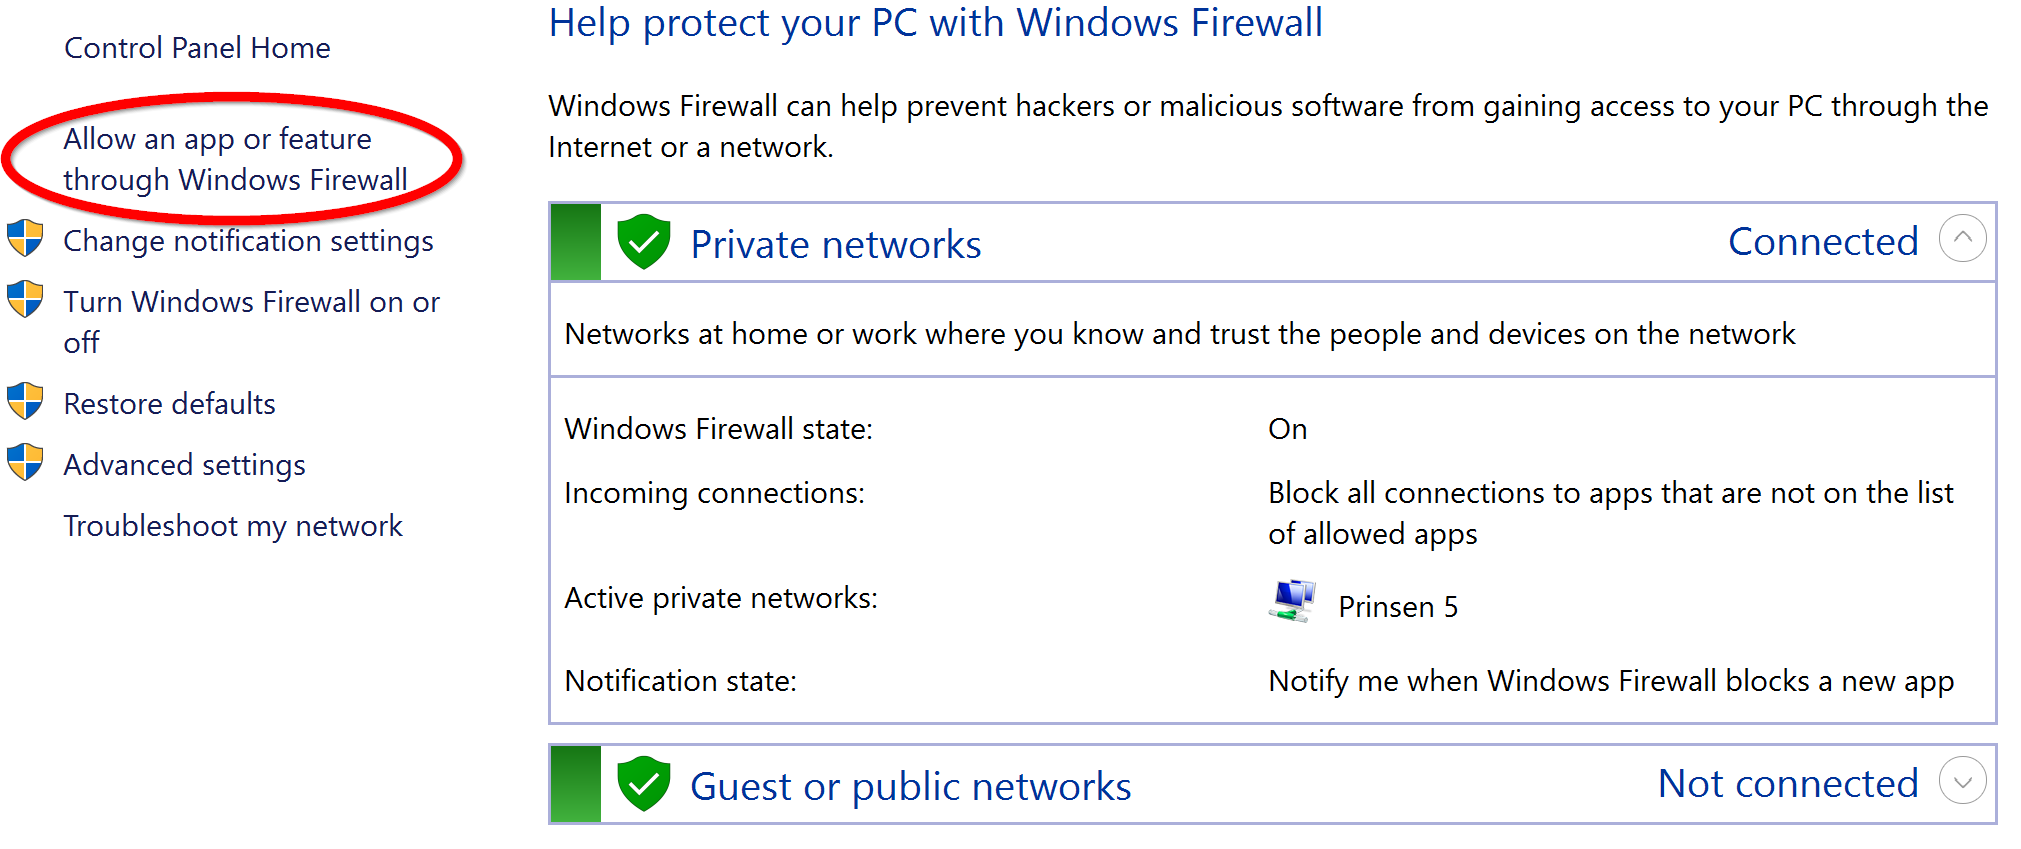
When we install our small web server in the development workstation, we do attempt to register it properly in the Windows Firewall. In case it doesn’t work as expected, you must adjust the firewall to enable access to the built-in web server, or our preview functionality will be unavailable. Please follow the instructions below.
The built-in server automatically finds a free incoming port, so the port number may change. You must ensure that the firewall is open for all ports that are opened by node-ssc.exe, not only the port number it is currently using.
The instruction on how to change these settings in the Windows Firewall are below. Please follow the instructions relevant to the version of Windows that is used in the development environment. If you use a third-party firewall, please follow the corresponding instructions in the applicable documentation.
These instructions apply to the development workstation, e.g. the PC where you have installed WrapCreator, if it’s running Windows 8 or Windows 10.
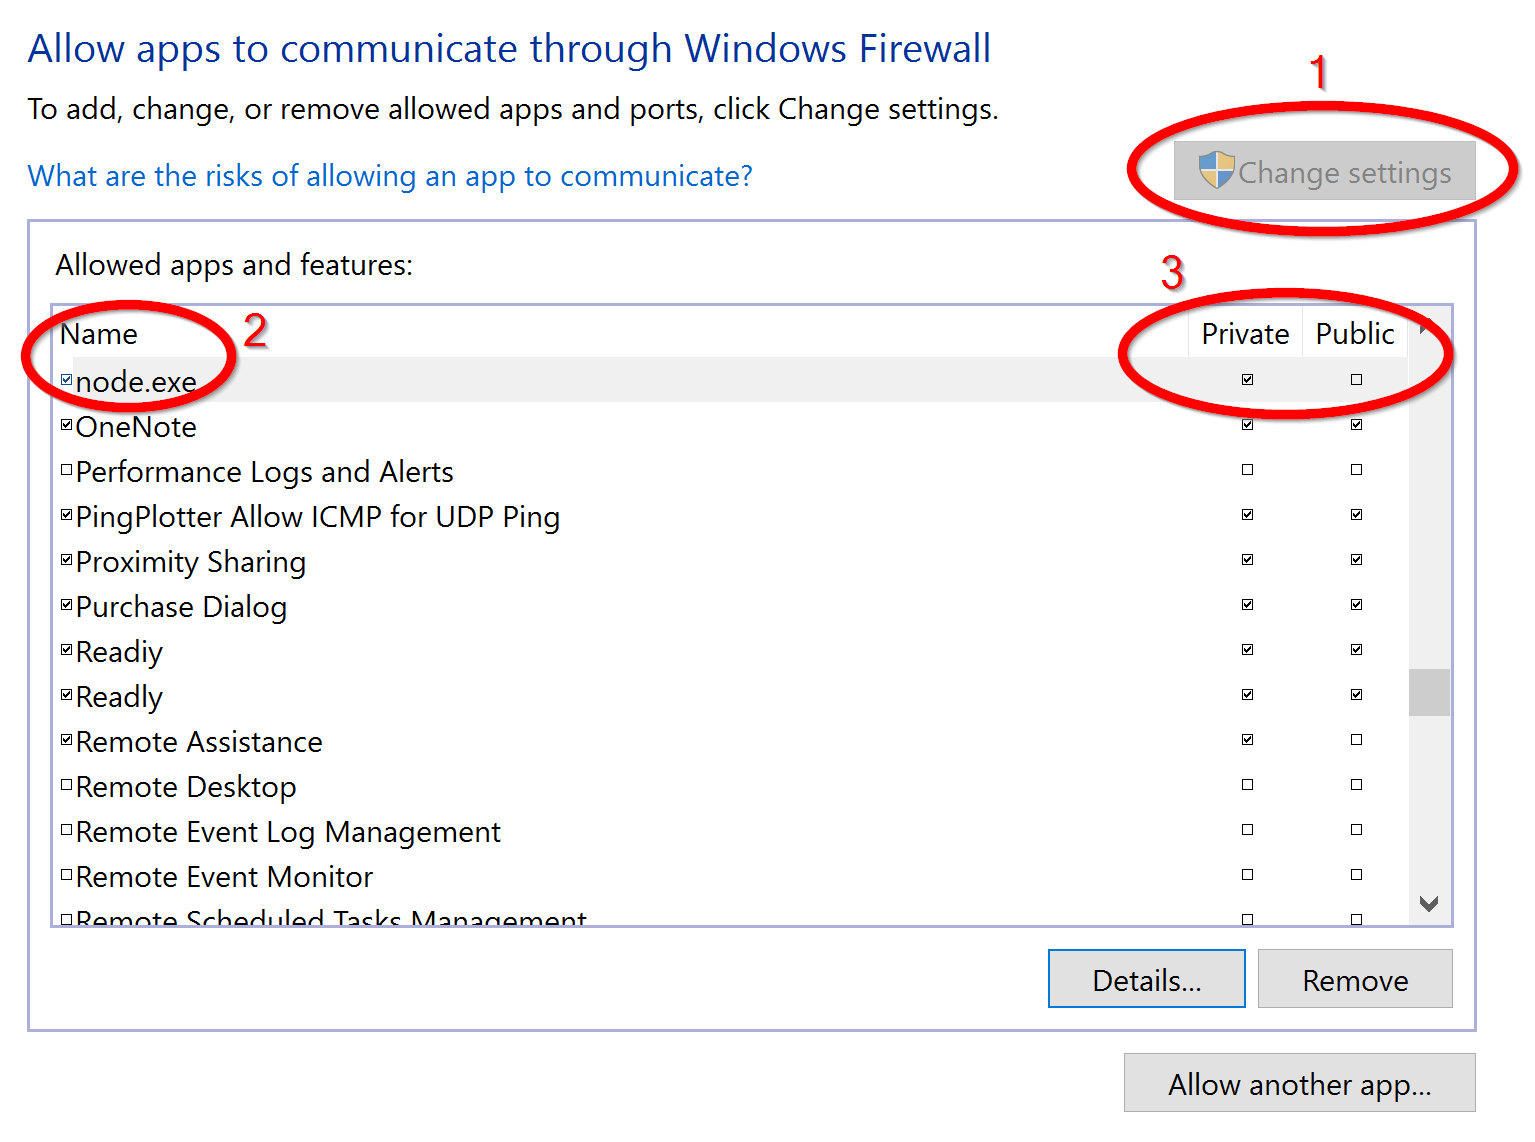
These instructions apply to the development workstation, e.g. the PC where you have installed WrapCreator, if it’s running Windows 7.
