Use the Google Map widget to insert a dynamic map into your Wrap. You can control what the map is showing from inside the Wrap.
The Google Map widget lets you use a map in a Wrap created from a spreadsheet. You can have the spreadsheet control what area the map shows, and insert pins on specific, named locations.
Google Maps is not an entirely free service. You need a Google account with billing enabled, using a valid credit card that has not expired. Using this account, you request an API key that you use whenever you show maps on your website. The API key is used to pay Google for the map impressions that exceed your company’s free monthly quota. Registering for an API key is free and uncomplicated, but your API key may be stolen if you implement it incorrectly, which may lead to unexpected charges to the credit card you use with Google. If you are not responsible for your company’s Google keys, you should contact the person that is. When you have an API key, you must register it in the settings for your wrapsite.
In the spreadsheet, select the cell where you want the upper left-hand corner of the map. Select the Google Map widget on the Widget tab of the task pane to insert the Google Map widget in this cell. Using the corners and sides of the Google map object, drag it to the required size.
The image shown in the Excel spreadsheet is just a static placeholder and will not reflect the changes you make in the widget’s settings. It is not until you convert the spreadsheet to a web page and load it into a web browser that the actual map appears according to your settings.

Select the Map Type. A Road map is schematic, a Satellite map is assembled from photos taken from a satellite.
Set the Initial Zoom. This controls how much of the world that is initially shown on the map. To give you an idea of what number to use, you see most of the world at zoom level 3, and the entire USA at zoom level 5. A major city like London fits in a zoom level around 10. A borough like Manhattan or Hollywood is suitable for a zoom level of 15. At a zoom level of 20, small animals like cats and dogs are clearly visible on the Satellite map.

Click on the link for Show Optional Settings…
In the Optional settings, you can define what location you want in the exact center of the map. The widget gets these geographical coordinates from a cell in the spreadsheet.
For Geo location, select the cell in the spreadsheet that contains the geographical coordinates for the map center. To determine the coordinates you can use our free map helper tool, see below. You can also use a reasonably exact name that Google understands, e.g. “Alexanderplatz, Berlin, Germany”.
If you want a marker at the center position, tick Show central marker in Map.
For Marker Title, select the cell that contains the title for the map center marker.

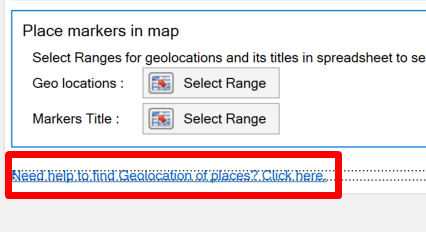
In the Place markers in map section, you can place one or more additional markers on your map with descriptive titles. The widget gets this information from a cell area in the spreadsheet. Just create a list of the location and title for each marker, or copy the Table of markers from the map helper tool (see below) to the spreadsheet.
For Geo locations, select the cell area that contains the coordinates for all locations where you want to place a marker. To determine the coordinates you can use our free map helper tool, see below. The location for each marker can also be specified with a reasonably accurate location name that Google understands, e.g. “Princess Gardens, Toronto, Canada”.
For Markers Title, select the cell area that contains the title for each marker.

Before you can use the Google Map widget, you must specify your API key in a setting on the wrapsite.
Save the spreadsheet and convert it. After the conversion, the converted web page will open in one or more of your browsers, and you can see the result of your settings.
If your Google map does not appear, and you get a text saying Oops! Something went wrong or similar, there may be a problem with your Google Maps API key.
Our free Map Helper Tool lets you create a preview of a map you want to show in your spreadsheet. The Map Helper Tool is a simple web app that lets you tailor the zoom level, find the appropriate center location for the map and place the markers you need on the map.
Click on the link to the Map Helper Tool at the bottom of the Optional settings for the Google Map widget to open the tool in your web browser.

Use the text field at the top to search and position the map approximately where you want it.

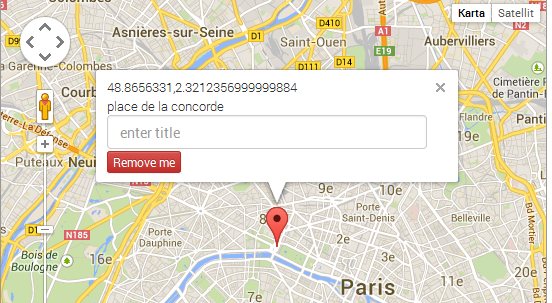
As you can see, the tool automatically centers the map on the requested location and inserts a marker. If necessary, drag the marker to the exact location. If you intend to place a marker in the center of the map, you should also enter a title for it.
All marker coordinates are saved automatically in the Table of markers below the map, so you don’t have to save anything manually. However, if you remove the selected marker by clicking Remove me, you may want to save its coordinates first as this will also remove it from the Table of markers.
You can add additional markers manually by right-clicking anywhere on the map. You should enter a title for each marker.

All locations you search for and all markers you add manually are saved in a Table of markers below the map. You should enter a title for each row in the table. When you have marked all locations, you can select the entire list and copy it over to your spreadsheet with Ctrl-C.

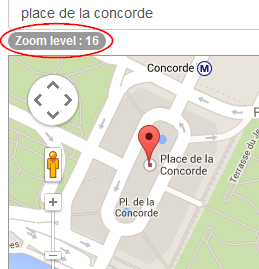
Use the zoom selector on the left side of the map to find the appropriate zoom level for your map. The selected zoom level is shown above the map. Just copy this number to the Initial Zoom setting for your Google Map widget.
