The Tools menu

The Tools menu in the Excel ribbon menu contains advanced options for the experienced wrap developer.

The WrapCreator ribbon contains a lot of useful buttons and links. Some of these features have been grouped in a separate menu called Tools.

Map to names

Cell names are required for all input and enabling cells, and encouraged for calculated cells. Naming cells is always good for wrap design and the Map to names feature allows you to name cells with ease.

  • You need a two-column layout with all the labels in one column and the corresponding input cells in another. (If your layout is different, we have provided a few tips under Create cell names with formulas below.)
  • Use the mouse to select the range of spreadsheet cells that contain the field labels you want to use also as cell names.
  • Hold the CTRL key on the keyboard while you click on the top-left cell of the cells you wish to name.
  • Press the Tools > Map to Names button. The text in the first selected cell will be used as the name for the first cell in the corresponding cell area, etc.

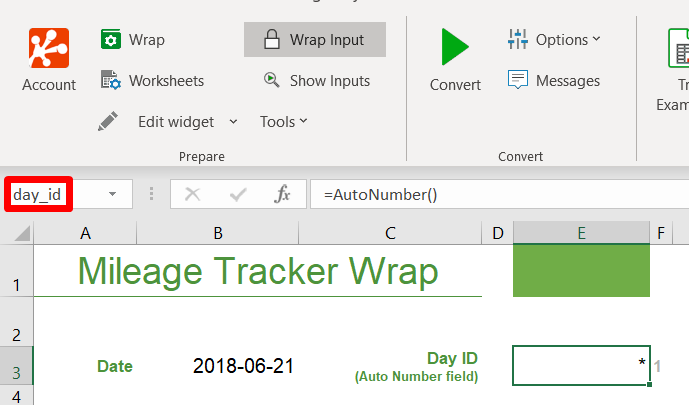
When you use the Map to names feature, any forbidden characters in the field labels are automatically removed, making the cell name slightly different from the field’s label. To verify the automatically generated name for a cell, just select the cell and its assigned cell name appears to the left of the formula field.

In the screenshot below, a field with the label “Day ID” has been automatically assigned the cell name day_id.

Screenshot of the cell name field in Excel

Creating cell names with formulas

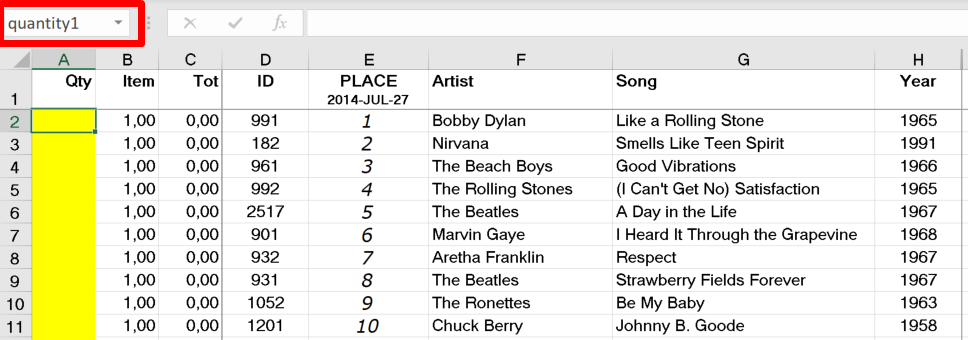
You can automate the process of naming cells also in situations where each individual cell does not have its own label. Maybe you are developing a wrap with a tabular layout, like this table (courtesy of Acclaimed Music):

Screenshot of an order form with one row per product and the A columns used to enter quantity

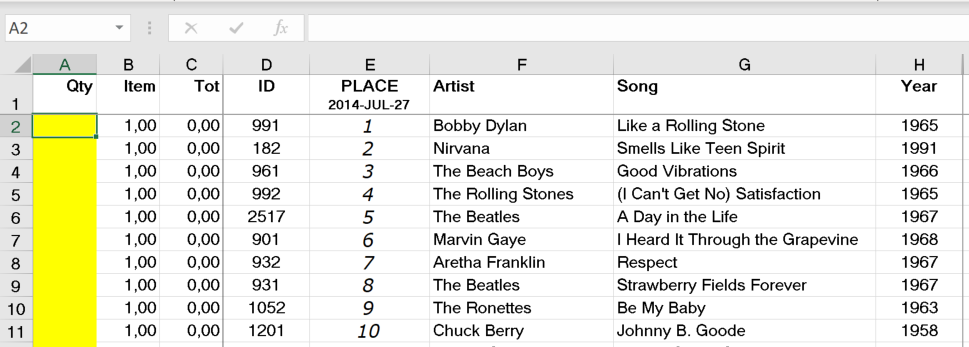
Manually assigning unique names to all the yellow cells in the Qty column will quickly become tedious. Now let’s solve this problem with Excel formulas instead.

Let’s say you want to assign the name quantity1 to cell A2, quantity2 to call A3 etc.

  • Insert a new column to the left of the Qty column.
  • In row 2 of the new column, enter the formula =”quantity”&ROW()-1
  • Fill the formula down to the end of the column.
  • Note that cell B2 (and all the others) still don’t have a name.

Screenshot of the order form with an added column containing the cell name calculated by a formula

You can use any formula to calculate any range of names you like, as long as all the names follow the Rules for cell names in Excel above.

Now, you’re all set up to use MapToNames.

  • Use the mouse to select the range of cells containing the field labels, in this example A2:A901.
  • Hold the CTRL key while you click on the top-left cell of the cells you wish to name, here B2.
  • Press the Tools > Map to Names button.
  • Select cell B2 and verify that a cell name has been assigned.

Screenshot of the order form where cells have been named from a column containing the cell name calculated by a formula

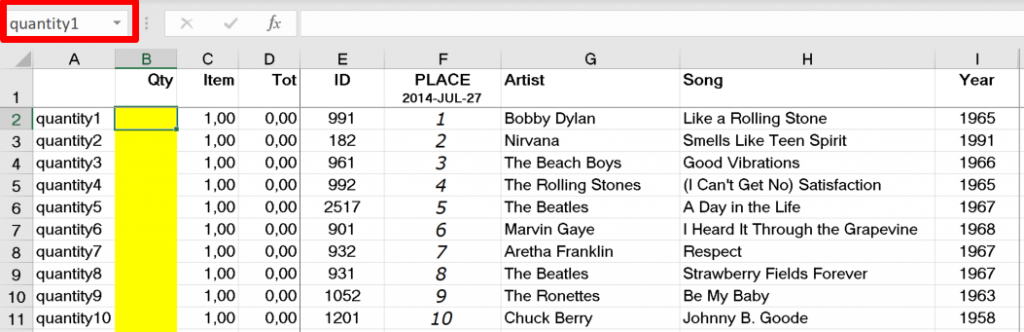
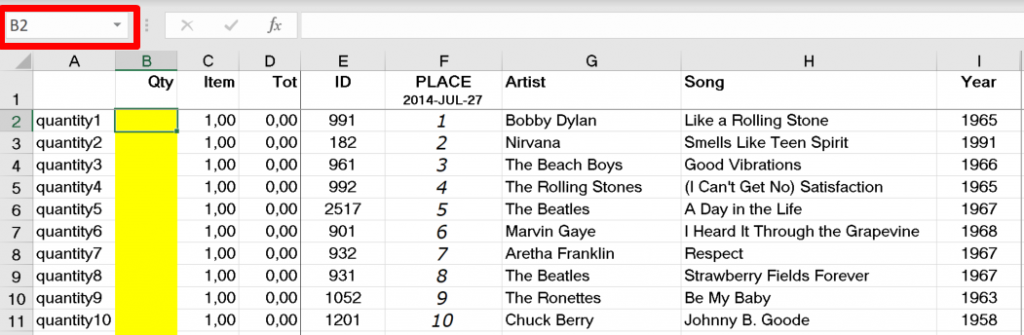
You probably no longer need the temporary column A with the calculated cell names, so you can delete that column now. As you can see, the cells in the Qty column retain their assigned cell names.

Screenshot of the order form after the extra column with the calculated cell names has been deleted

Create from Selection

Excel offers a similar function in ribbon > Formulas > Create from Selection. There are a few differences between the native function and our Map to Names:

  • Excel requires that the labels and cells are adjacent, e.g. if the labels are in column C, the cells must be in column D. Our Map to names feature allows the cells to be in any other column.
  • Excel permits a cell to have more than one name. If you use Excel’s function to name cells, it may add additional names to cells that are already named. WrapCreator does not allow a cell to have more than one name since this increases the risk of mistakes.

If you prefer the Excel function, you can still use it, as long as you manually ensure that every cell has only one name.

Read more about the rules for input files in ExcelWraps.

Map to notes (formerly comments)

Cell notes in Excel (formerly called “comments”) become hover tips on devices with a mouse. The hover tip appears when you hold the mouse over the field and often provides additional explanation or instruction.

Unfortunately, touch screen devices like tablets and smartphones do not have a hover event. For touch devices, you must touch once to reveal the hover tip, then touch again to select the cell for editing.

  • To add a hover tip to a single cell, right-click the cell and select New Note from the menu.
  • If you have many similar wraps with the same input fields appearing again and again, you can save time by placing the hover tips separately as normal text in a cell range that you can easily copy from one wrap to the other. To add these hover tips to a new wrap:
    • Paste the texts for the hover tips into the new spreadsheet.
    • Select the range of cells containing the texts.
    • Hold the CTRL key while you select the top-left cell of the cells you wish to add these notes to.
    • Press the Map to comments button. The text in the first selected cell will be used as the hover tip for the first cell in the corresponding cell area, etc.

Clear names

All named ranges within the current selection are deleted. This is much faster and easier to use than Excel’s native Name Manager.

Clean bad names

Excel allows you to assign names to cells for easier reference, e.g. with Map to names described above. If you use a name that Excel does not allow, it will tell you immediately.

But there are other cell names that WrapCreator considers “bad”:

  • Links to other workbooks – You cannot make external references to other workbooks from a wrap. You should redesign your solution to communicate via the database instead, using WrapLinks.
  • Broken references – If Excel responds #REF to a cell name, the cell contents refer to something that no longer exists.
  • Reserved names – See below for a list of cell names that are reserved because WrapCreator uses them.

When you create a wrap from a spreadsheet, WrapCreator automatically checks for bad names. The same function is provided in the Tools menu so that you can check for bad names whenever you like.

Reserved names

WrapCreator reserves some cell names for its internal use, e.g.

  • Widget names – You cannot give a cell the same name as a widget, e.g. “wraplink”, “userselector” or “cinput”.
  • Restricted cells – “holder” and “autonumber” are reserved names.
  • Internal names – Many WrapCreator functions have their own reserved names, e.g. “class”, “created”, “debug”, “function”, “id”, “item”, “lastmodified”, “signed”, and other similar names.
  • Coded names – WrapCreator internally uses the reserved names “_ctrl_” and “_xfln”.

Force last cell

A spreadsheet consists of rows with columns. When creating a wrap, WrapCreator has to go through all of these rows and columns. If the spreadsheet has been edited a lot, you may end up with trailing empty rows or columns that make the spreadsheet much bigger than you think it is.

If your conversions are starting to take a very long time, empty rows and columns can be one of the causes.

To ensure that all redundant information is cleared from a spreadsheet, select the right-most cell in the last row of the spreadsheet and select ribbon > WrapCreator > Tools > Force last cell. This will automatically delete all content below and to the right of the current cell.

Remove XLW link

This function is provided for compatibility with the XLW add-in, the predecessor to WrapCreator. If you have never used XLW you can ignore the Remove XLW link function.

Wraps created with XLW have links that need to be adjusted by WrapCreator.

  • If you have a spreadsheet that was previously edited with XLW and you have installed WrapCreator but not XLW, you will get a prompt to replace the old XLW links. This is a forward-compatible operation, i.e. there’s no going back to XLW. Save a copy of the old wrap if this worries you.
  • If you have installed both WrapCreator and XLW, you are probably in a transition, and so we will not prompt you to replace the XLW links. In this case, you must decide when to do the cutover and remove the old links using this function. Again, you won’t be able to use the wrap with XLW after this change.